Tuesday, November 15, 2022

The Green Door: The Farm Report 11-15-2022

 The Green Door

The Farm Report
11-15-2022


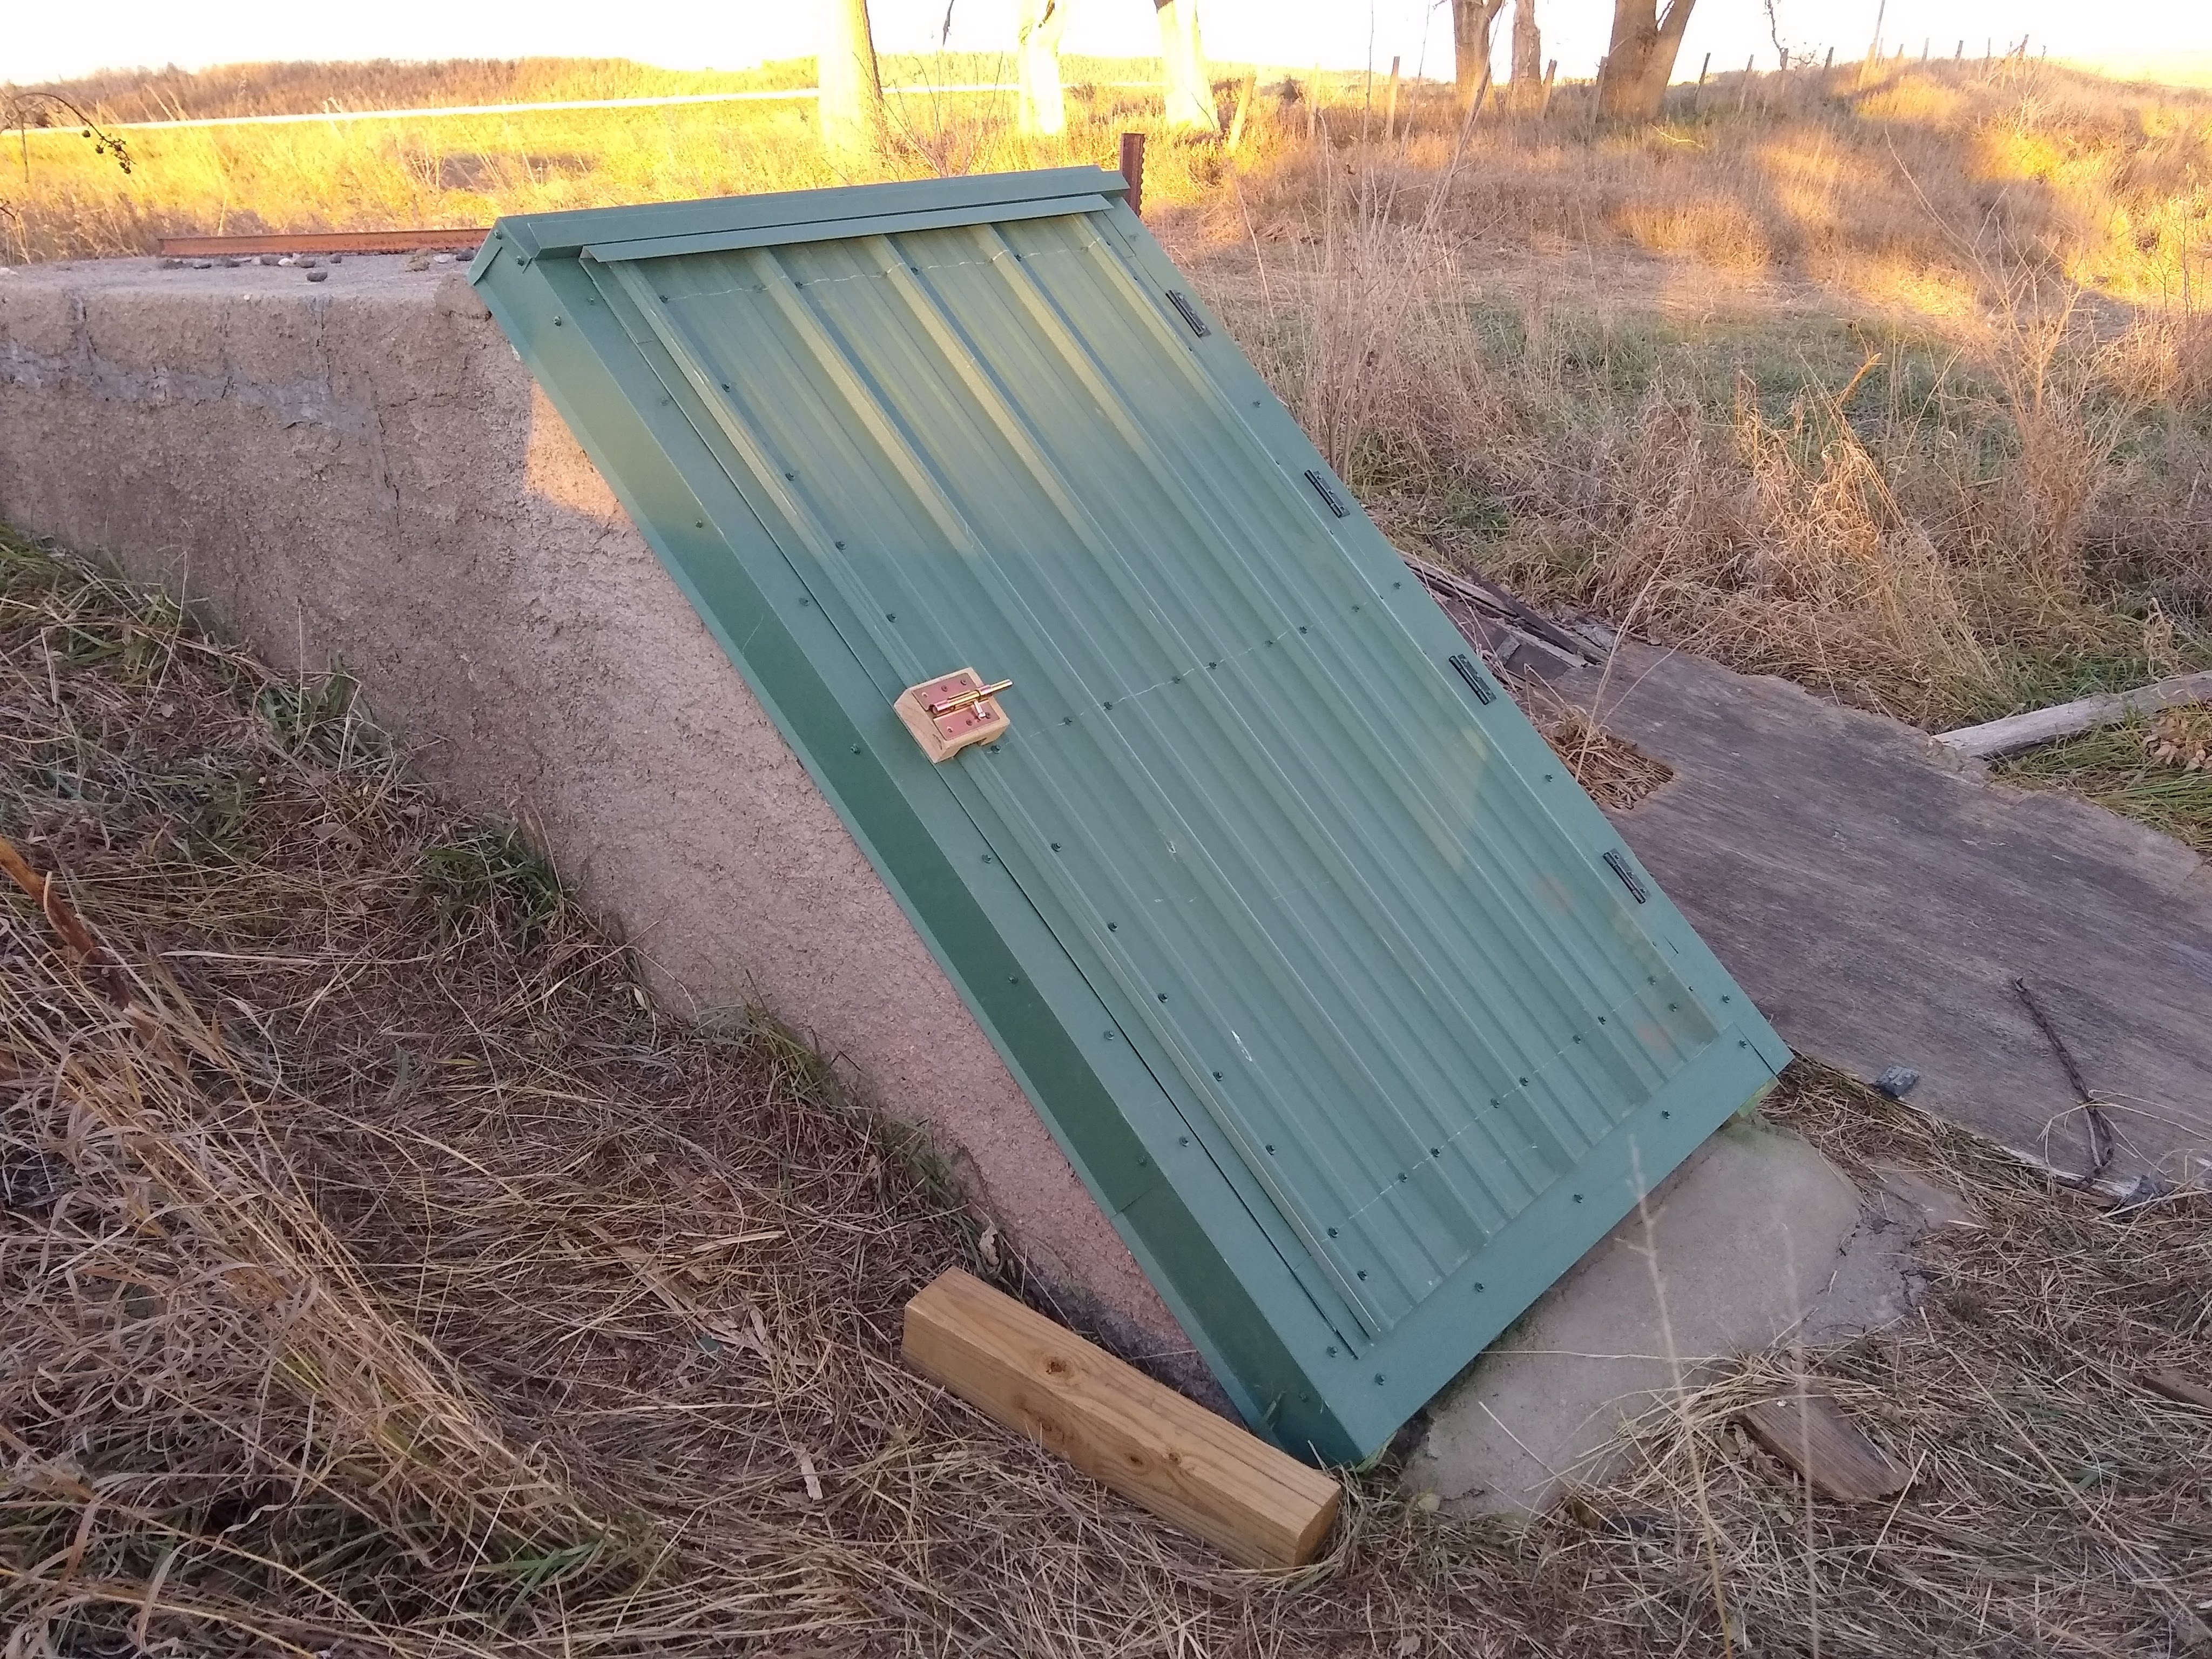
What's behind the Green Door? A heck of a lot of detail work! This is the finished outside door on my Grandpa's root cellar/storm cave. I've spent quite a lot of time getting this project finished, and I've had a number of questions about it too. So, I thought I'd just do a whole blog post on it and let you follow along as I built it.


Here is where the project started. This old 'Cave' as we always called it, was just a few steps away from the old house where I grew up. That house had no basement, so there wasn't any place to store food like canned goods, potatoes or apples, etc. There also was no place to go duck when a tornado threatened. Out here, they do, and pretty often! Ask Dorothy.

After lots of family discussions, we have all pretty much agreed that this must have been dug at about the same time that my house was built. Make that 1903. Why? The old house that isn't there anymore was moved from where my house is now to the 'new' site. We think the well, which is just out of camera view, and the cave were made at the same time. The quality of the masonry construction is superb. It was made by tradesmen, who would have been on hand to do the house project.

Over the years, the original outside door fell apart. The original wood framing members were still hanging around, but the door had been replaced by a piece of plywood.


From that to this. I'm risking breaking my arm patting myself on the back, but I think the new door came out pretty good. We'll need to pour a new concrete stoop next spring.


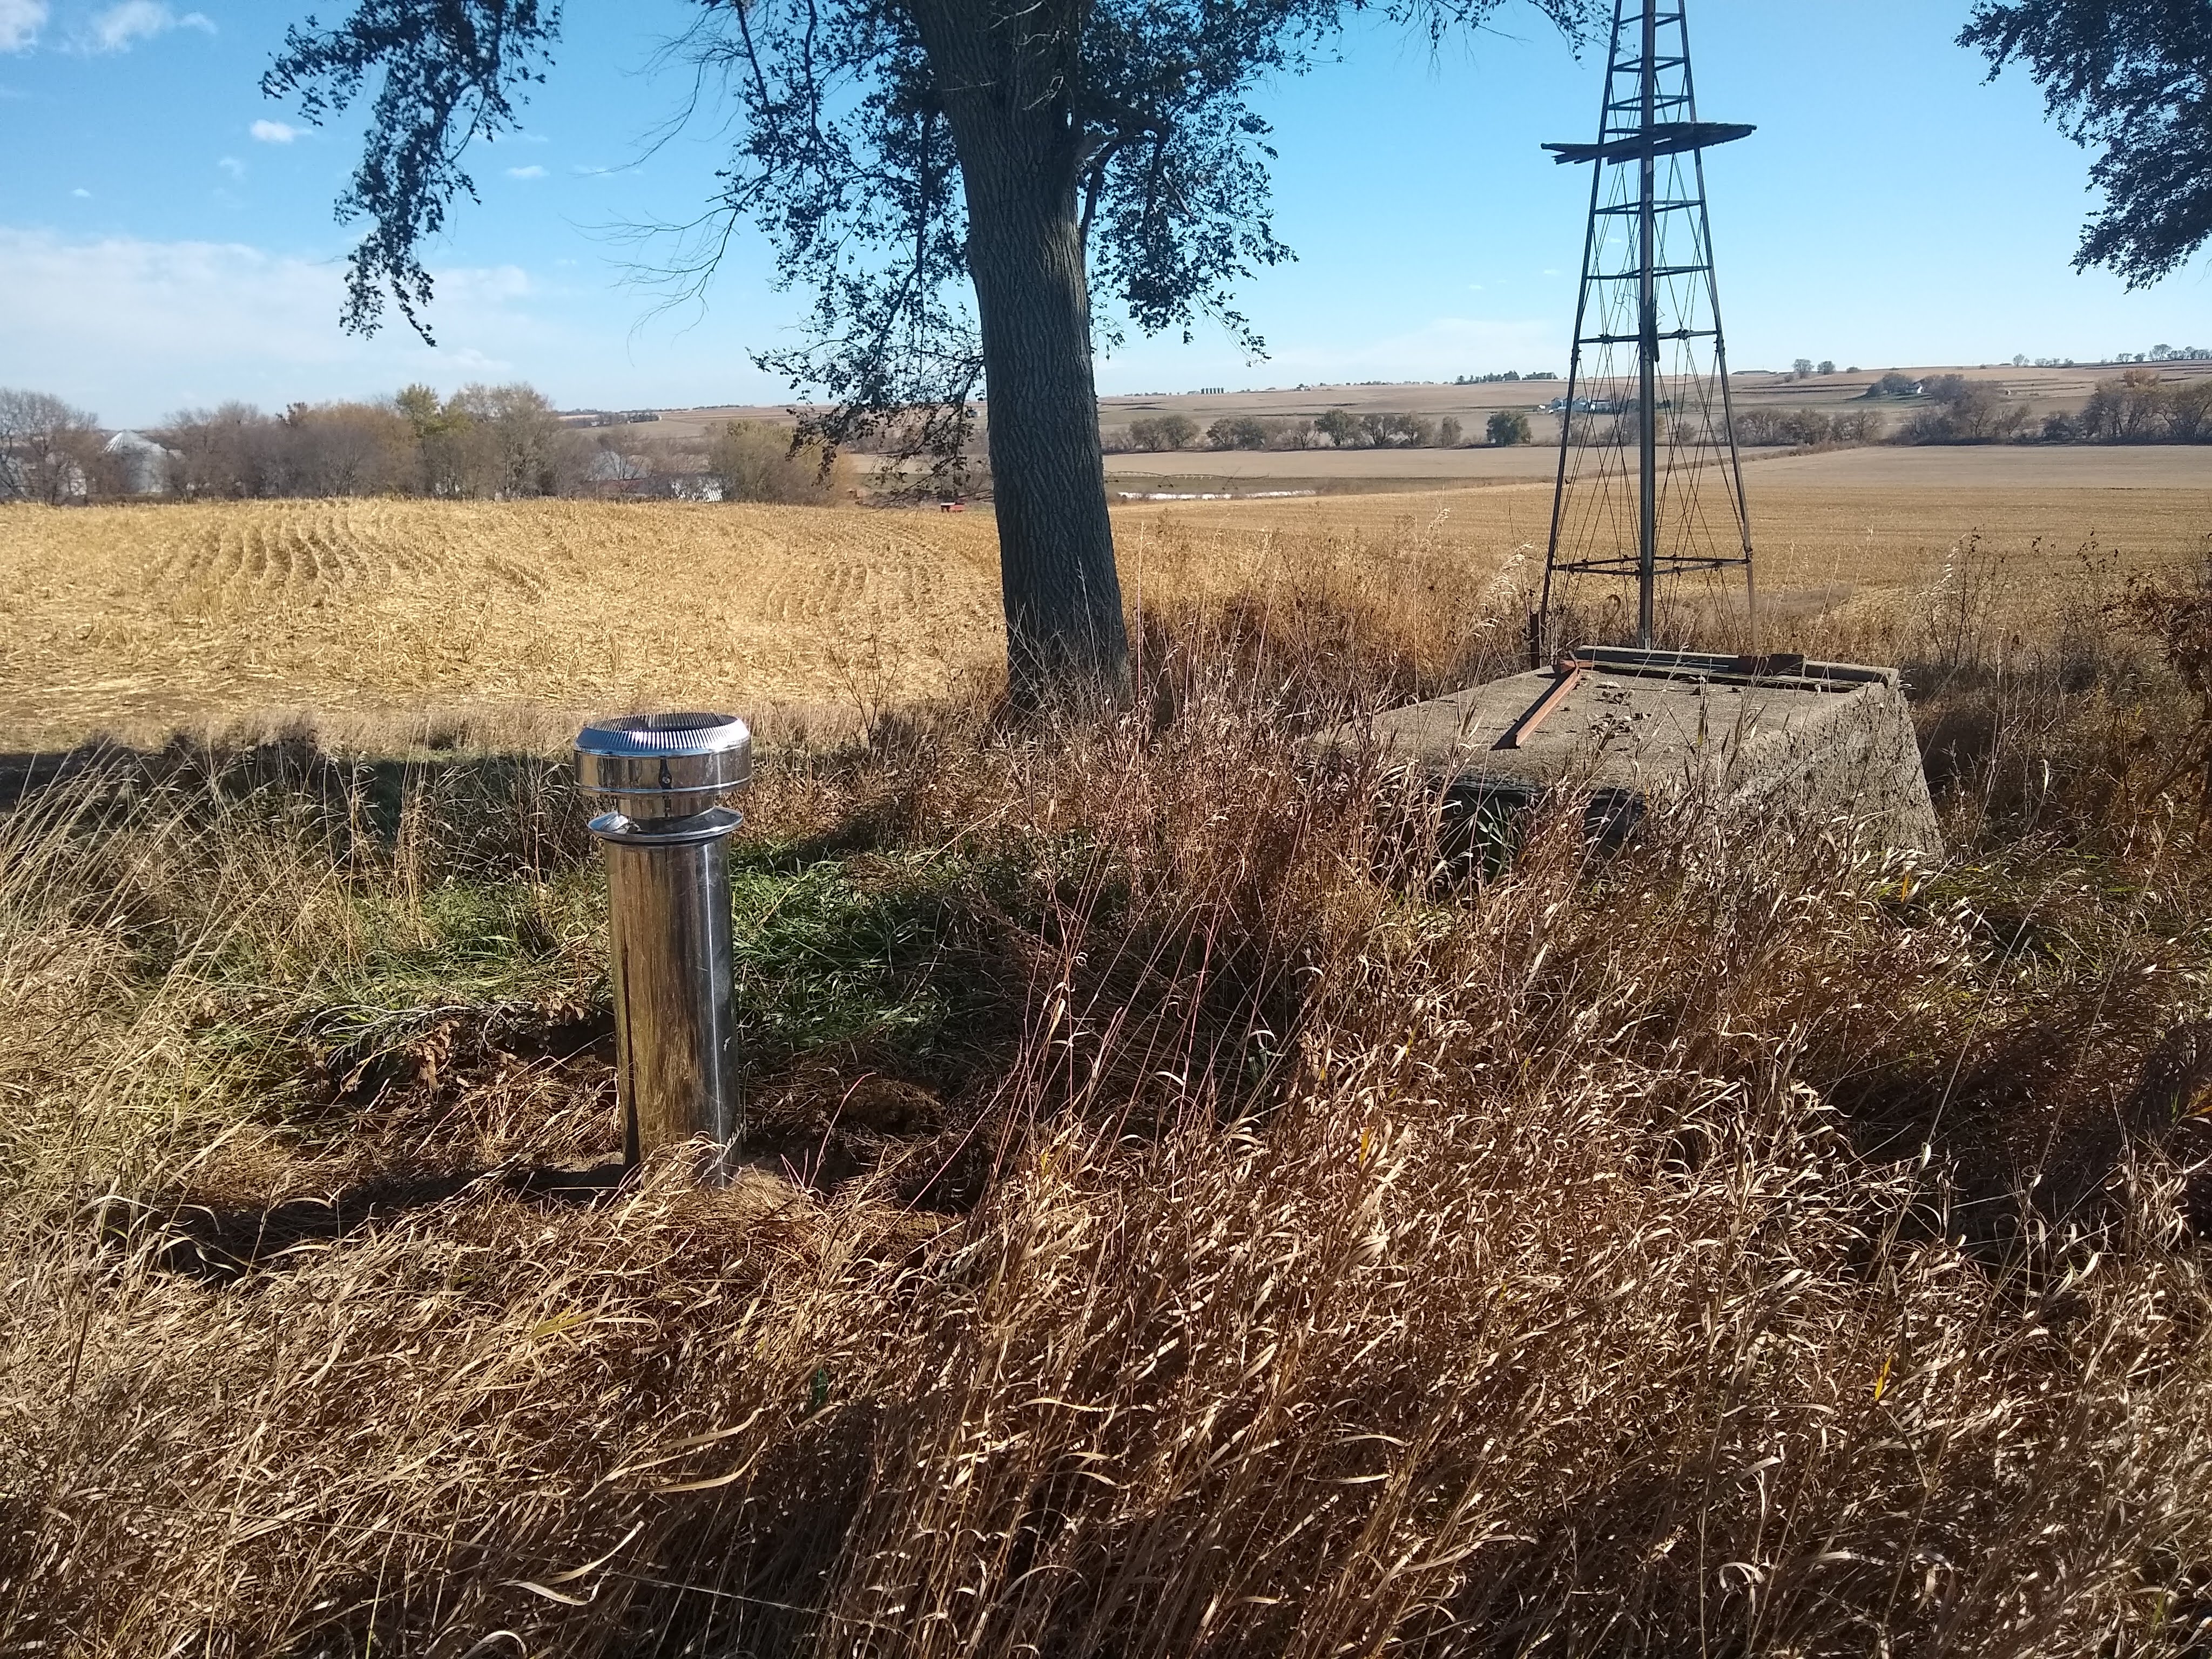
First things first, though. These caves needed a vent to keep the air fresh and to provide a little air circulation. The original clay tile vent pipe had been removed a long time ago. I didn't want to risk being down in that cellar without venting. It could become a CO2 death trap. That happens, and it is dangerous. So, first we attended to the vent. Oh, and just for reference, the cave extends about 2 more feet behind that vent tube toward the left of the pic! The cave is about 8ft by 12ft with a domed ceiling and deep. When I'm standing in the bottom of the cave room, my head is below ground level. It is about 12 feet down from this vent tube. The concrete work around the door is just the ante room and the steps.


Not everybody would use a Class A stainless steel chimney for their cave vent. I happened to have the pipe from salvaging another project. So...why not!? My brother came out to the farm and we conjured and witched to find the spot where the old clay tile vent tube should have emerged from the ground. We poked around and did a little test digging and 'Presto!' we found the original remains.


After some judicious digging and fitting, we put in the stainless tube. It is about twice as long as what you can see. We poured ordinary dry builder's sand around it to seat it in place.


Then we put soil and sod back over it to finish it off. Annie was bored with the project, but she couldn't stay away. She new there weren't any mice down there, but when somebody is digging, she's in! I also had the stainless steel bird/rain cap, so we finished off the vent in Fifth Avenue style.


After the original wood plates were stripped off the concrete, we discovered the original anchor bolts were still in good shape. A little strategically placed heat and a bit of brute force and the old square nuts turned off like magic.


I used a Vice Grip pliers to hold the bolt shaft while I turned the old nut off.


And here's proof they don't make 'em like they used to. There was a little concrete 'squeeze out' left from when the original plates were set in the wet concrete. I thought I'd just take a cold chisel and hammer and clean off that excess so I'd have a nice flat surface to mount my new plates to. Well! That concrete is hard as granite!!! I tapped and tapped, then pounded and pounded, then slugged and slugged until my arm was sore. I finally just called it close enough. No wonder the old cave is still in like-new condition.


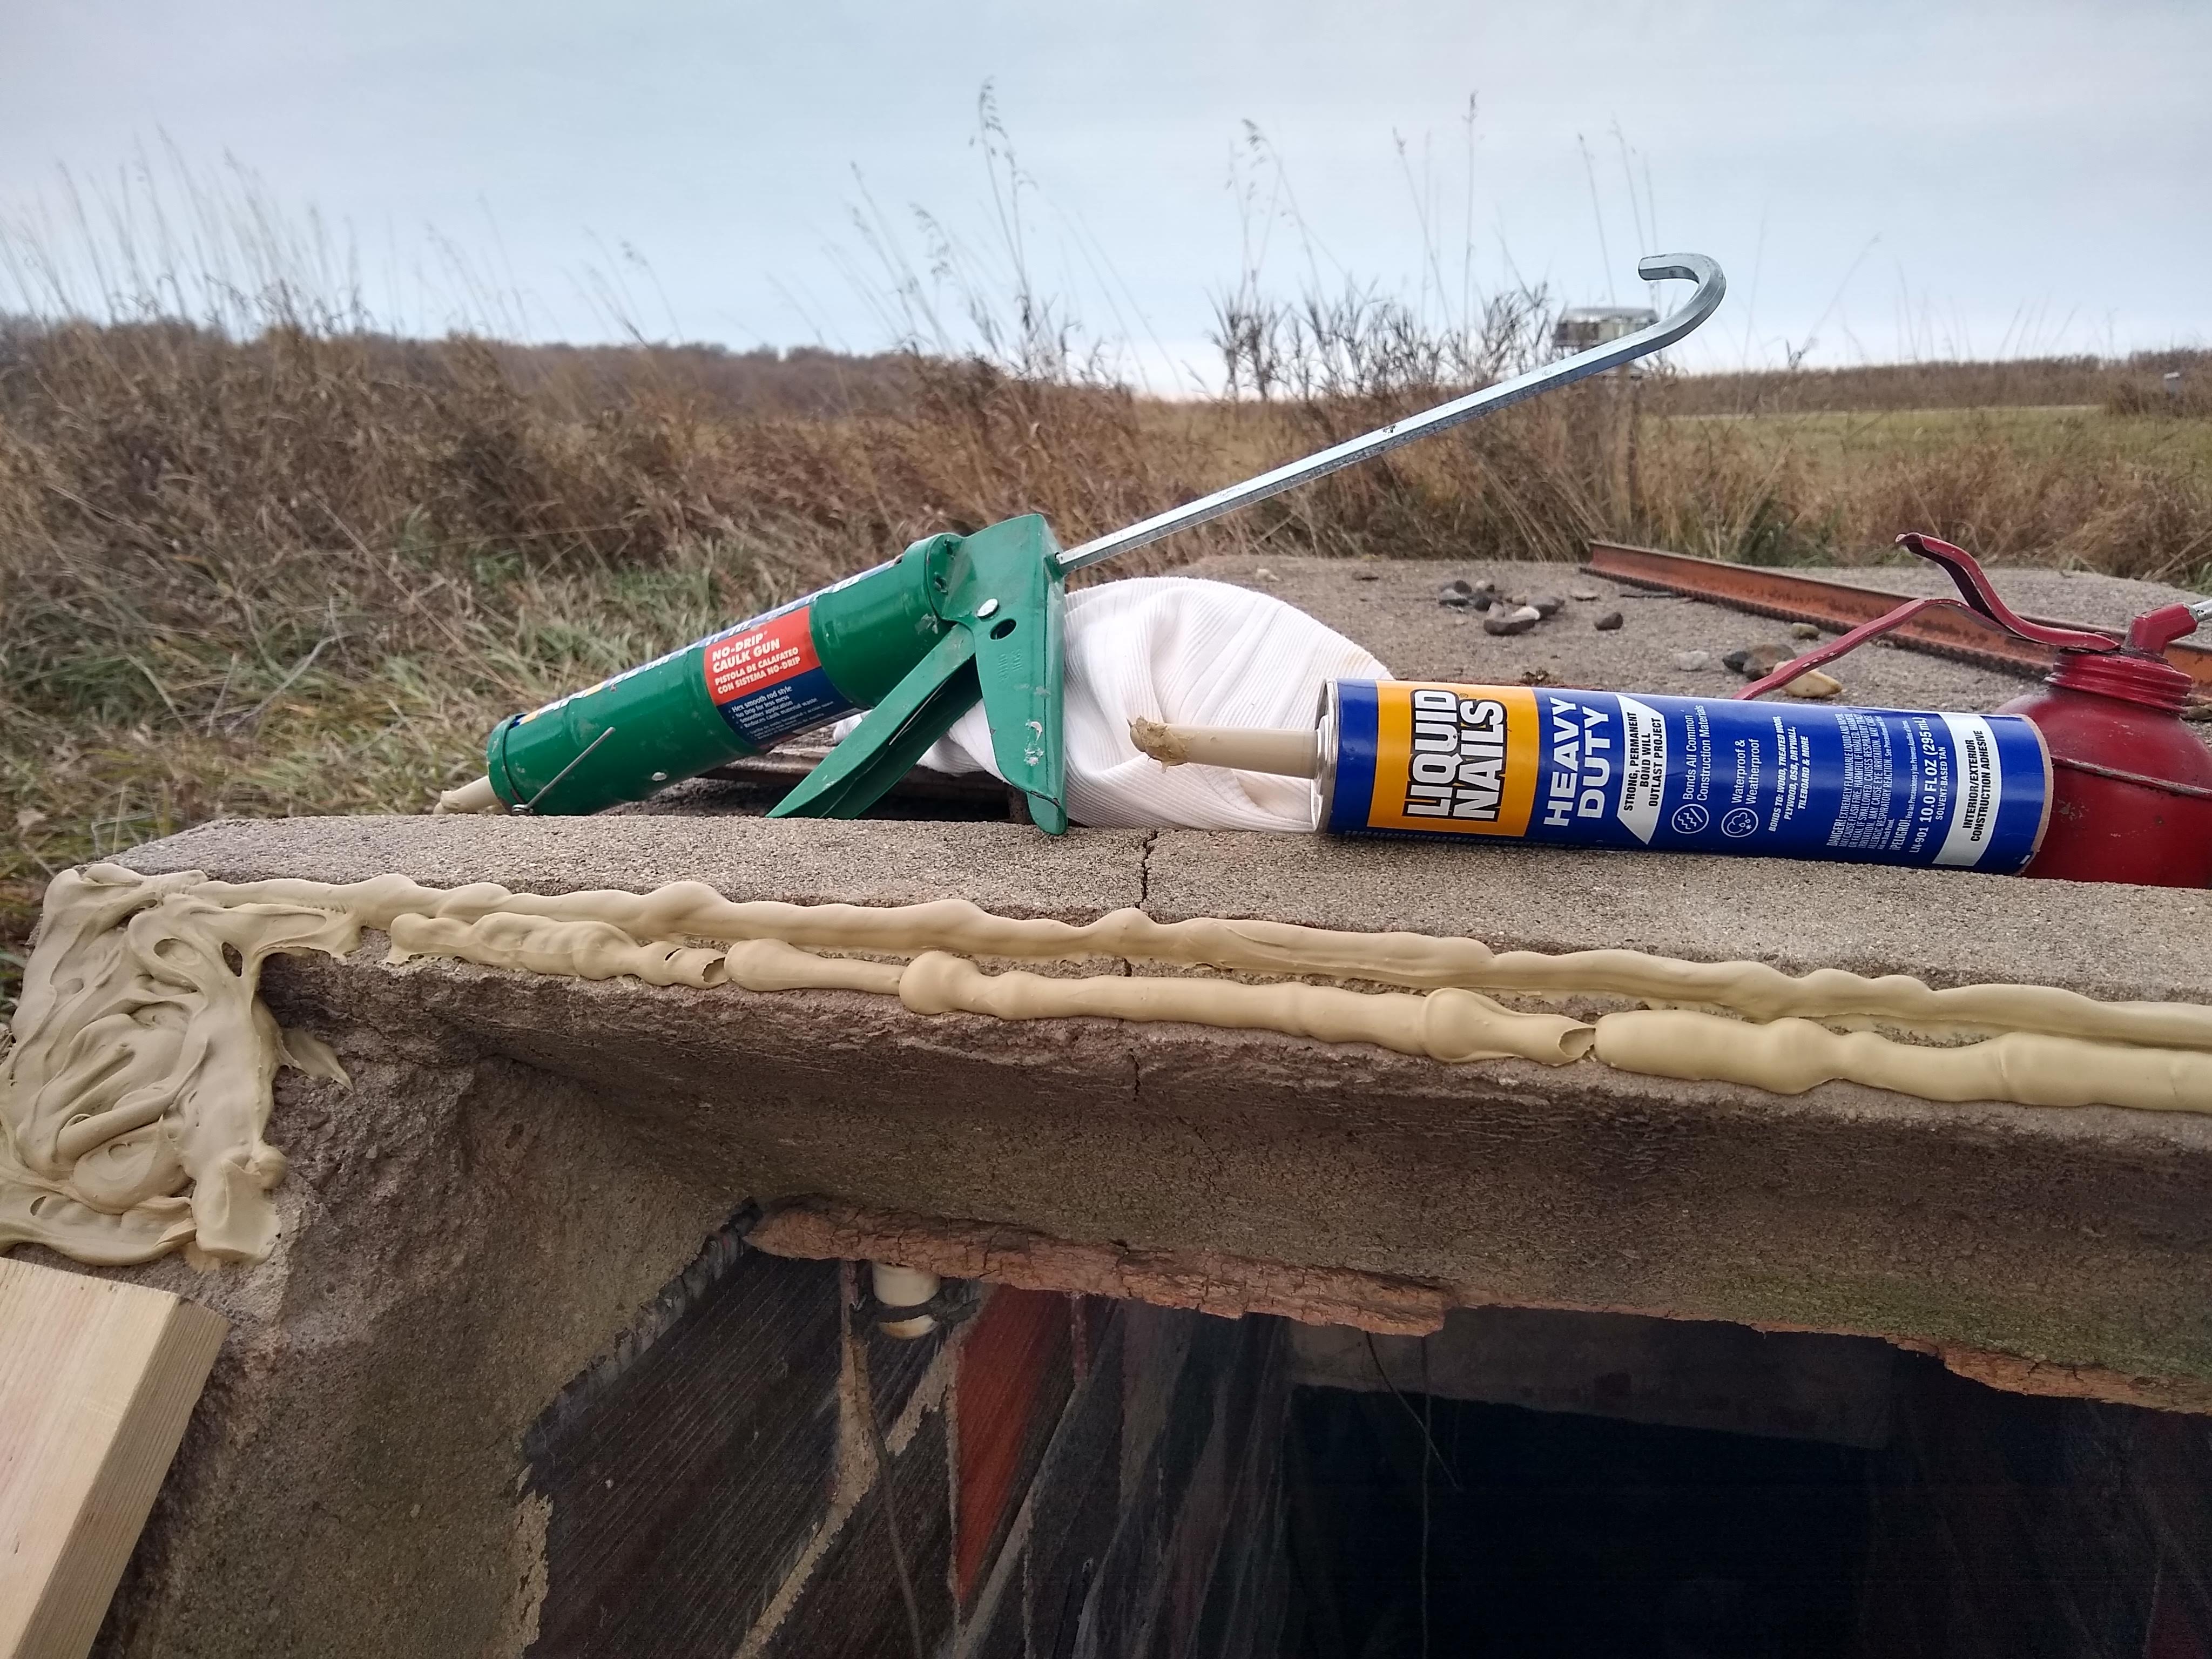
It isn't 1903 anymore. We have great new adhesives now that the old guys didn't even know about. I decided to set my new plates in a generous layer of 'Liquid Nails' construction adhesive instead of mortar. It is waterproof, bonds the wood and concrete together, and seals everything in place.


Here is the first set of plates down and tight.


So here's a little carpenter's secret. I didn't want the anchor bolts to be exposed, and I wanted to make a 'ledge' for the door to seat into for a better seal. I countersunk a blind hole on the underside of the new top plate so the anchor bold and nut would have a place to hide. You can see the anchor bolt which is screwed down tight, and the underside of the new top plate with the blind hole drilled into it. 


Same shot, with the new top plate flipped over and in place hiding the anchor bolts - and protecting them from weather. Always test fit your work before you apply glue!


I did not pose this picture. I absolutely promise that I did not pose this picture! Annie Oakley has been my job boss on this whole project. When I set the new base plate it was obvious I had made a little mistake. She saw this from her seat in her Ranger and hopped out to come do a close inspection. She SAW my error! I repeat: I did not make this up.


"Tim. You can do better than this. You're a professional wood worker." She looked up at me with this expression on her face, and I felt like a school boy caught cheating in class. I did not make this up. I was at least as disappointed in the error as Annie was, but I know how to fix my goofs, and we'll take care of this later. Nobody - except me and Annie - will ever know.


I did pose Annie for this pic. After I got the top plates glued and screwed down tight, we both breathed a sigh of relief and went home to make the door frame. We are both pleased with the new frame and plates.


I'm using up the metal left overs from my roof project for the skin on the cave door. I made a wood frame in my shop because it is so much easier to do there. I also used too many hinges, but remember - I live where the wind does blow! And the door will undoubtedly catch the wind sometime and try to go sailing. Overbuild, underuse....


I used too-big hinges so I had plenty of iron to fasten to. A little black smithing, and I bent the hinge legs over so I could have a screw holding from a different vector angle. I grew up here, and I know what wind can do.


Fitting doors is hard to do. It is even harder to do when you're working by yourself and you can't see what's going on underneath the steel skin. Solution? fit the door without the skin first! Another pet peeve of mine is doors and drawers that drag. Doors and drawers that fit too tight have been one of my signature gripes all my working career. Antique furniture sags and drags. Then folks start using their shoulders and hips to close the doors. Eventually, the cabinet breaks and I get a job. So...I left a big gap all around and allowed for the door to sag as it gets older without being able to drag.  It has a nice smooth movement, and I have engineered it to seal on the bottom edges, not on the sides.


Skin on, and Annie was ready for the end of the day. 


The next day we went back and finished facing out all the exposed wood with metal flashings. Now, there is absolutely no wood exposed to light or water. There are no joints which can be rained in or on, and this project should last another 120 years. So, in 2142, she might need a new 'un. I wish I could be around to see. I remember as a boy that the concrete work was mostly covered with soil. Over the years that soil has washed away. We're already making plans to bring in new soil and a machine to cover and berm up all the concrete like it used to be.


What will we use the cave for now? Who knows. It was just too good to let it go. Here are some amaryllis and canna lilies I dug which I will put down in there for cold winter storage. I have my potatoes stored away in another place for this year. Next year, though! I'll store my potatoes, carrots, beets and whatever down in the old cave.


This is a canna lily root. The horizontal one is the part I paid $15.00 for last spring. Every one of the vertical ones will make a new start next spring. This isn't a money making project, but when you can store your bulbs overwinter in a cold root cellar, you can multiply your work pretty cheaply!


The season has closed in for sure now. These are my Gypsy broccoli plants. 


And this is why I love Gypsy broccoli. It was still growing new broccoli heads right up until the plants just froze off. This last treat is special. You've never tasted anything so delicious as the last cold-grown broccoli of the season. Eliot Coleman says that 'sugar is Mother Nature's antifreeze.' He's right. The last Gypsy broccoli is tender, juicy, mild and sweet. Next year!


They're still at it. OJ likes to pick up where I leave off in the mornings. Apparently the blankets are still nice and warm for him. Annie wants attention - even from OJ. She thinks that if she rolls over on her back and slides in he'll be nice to her. Watch OJ's ears in these pics. They tell the whole story. Also, watch Annie's eyes. She's getting to be an older but wiser girl now!


"This isn't going good, Tim!"


"He's sticking his paw out at me!"


When OJ started to spread his kitty toes out to make his Tomcat claws ready to attack and raised his head so he could look Annie right in the eye, Annie decided it was an O.S. moment and got the heck outta there! She's a wise girl.

So that's the Green Door project. All is well at Oakdale Farm. Eat more turkey!


Saturday, October 29, 2022

Cleanup on Aisle 6: The Farm Report 10-29-2022


Fall Housecleaning is an old time tradition. We're doing that here at Oakdale Farm too. Among other reasons for the need is this. The Harvest. The guys are down there harvesting soy beans today. That cloud of dust is what happens when the dry soy plants hit the combine! Everything except the beans gets shredded and powdered.  The beans go up into the hopper on the combine, the rest gets blown back out where it came from - mostly. 


Harvest time is always dusty. The picture isn't 'cloudy' or out of focus. Everybody in the whole world is combining something right now. The whole countryside is a smog-like haze of harvest dust. Even putting the beans off the combine into the grain cart is dusty. Plus, we haven't had much for rain and the Earth is dry.


My good neighbor, Jeff and his crew were getting their machines ready to go at it the other morning. Annie thought they needed looking after, so she assigned herself a perch in my front lawn and sat there and watched them. She occassionally barked to let them know they were being watched and were OK, but to my immense pleasure she never once offered to run across the road to help. She didn't even go outside the fenced area.


Here's another 'Aisle 6' that needs major attention. The tomatoes on the tarp garden just out did themselves this year. I've got a ton of tomato juice/sauce/paste to show for it, too. But....


I started in with a groan. It is lots more fun planting than it is cleaning up. If I don't clean up NOW though, it won't be any fun planting again in the spring, either. One foot in front of the other one. Little by little. Rome wasn't built in a day. You fill in your favorite old adage. I'm gettin' 'er done. It is amazing how greasy slick those tomato mummies are though!


Did anybody say you can't grow sweet potatoes this far North? Well if you heard them say it, you can look 'em straight in the eye and say, "Phoooey!" This one is a Beauregard. It is one of my favorite varieties.


These ones are Centennials. They're OK, but they get long and leggy. That other stuff around them is what frostbit sweet potato vines look like after a very sudden 16F we had overnight recently.


This is what I mean about the Centennials. Oh, and next year, I'll use those little 'biodegradable' bags again but when I plant out I'm going to cut the sides so the plant roots have a better chance to escape. The catalog said these bags would dissolve. They probably will - sometime before the next century....


I'm not too much for cucumbers. I like pickles, but how many of those can one old guy eat? I found this pile of cukes laying on the ground after I pulled out the wire cage they were growing on. Who knew!?


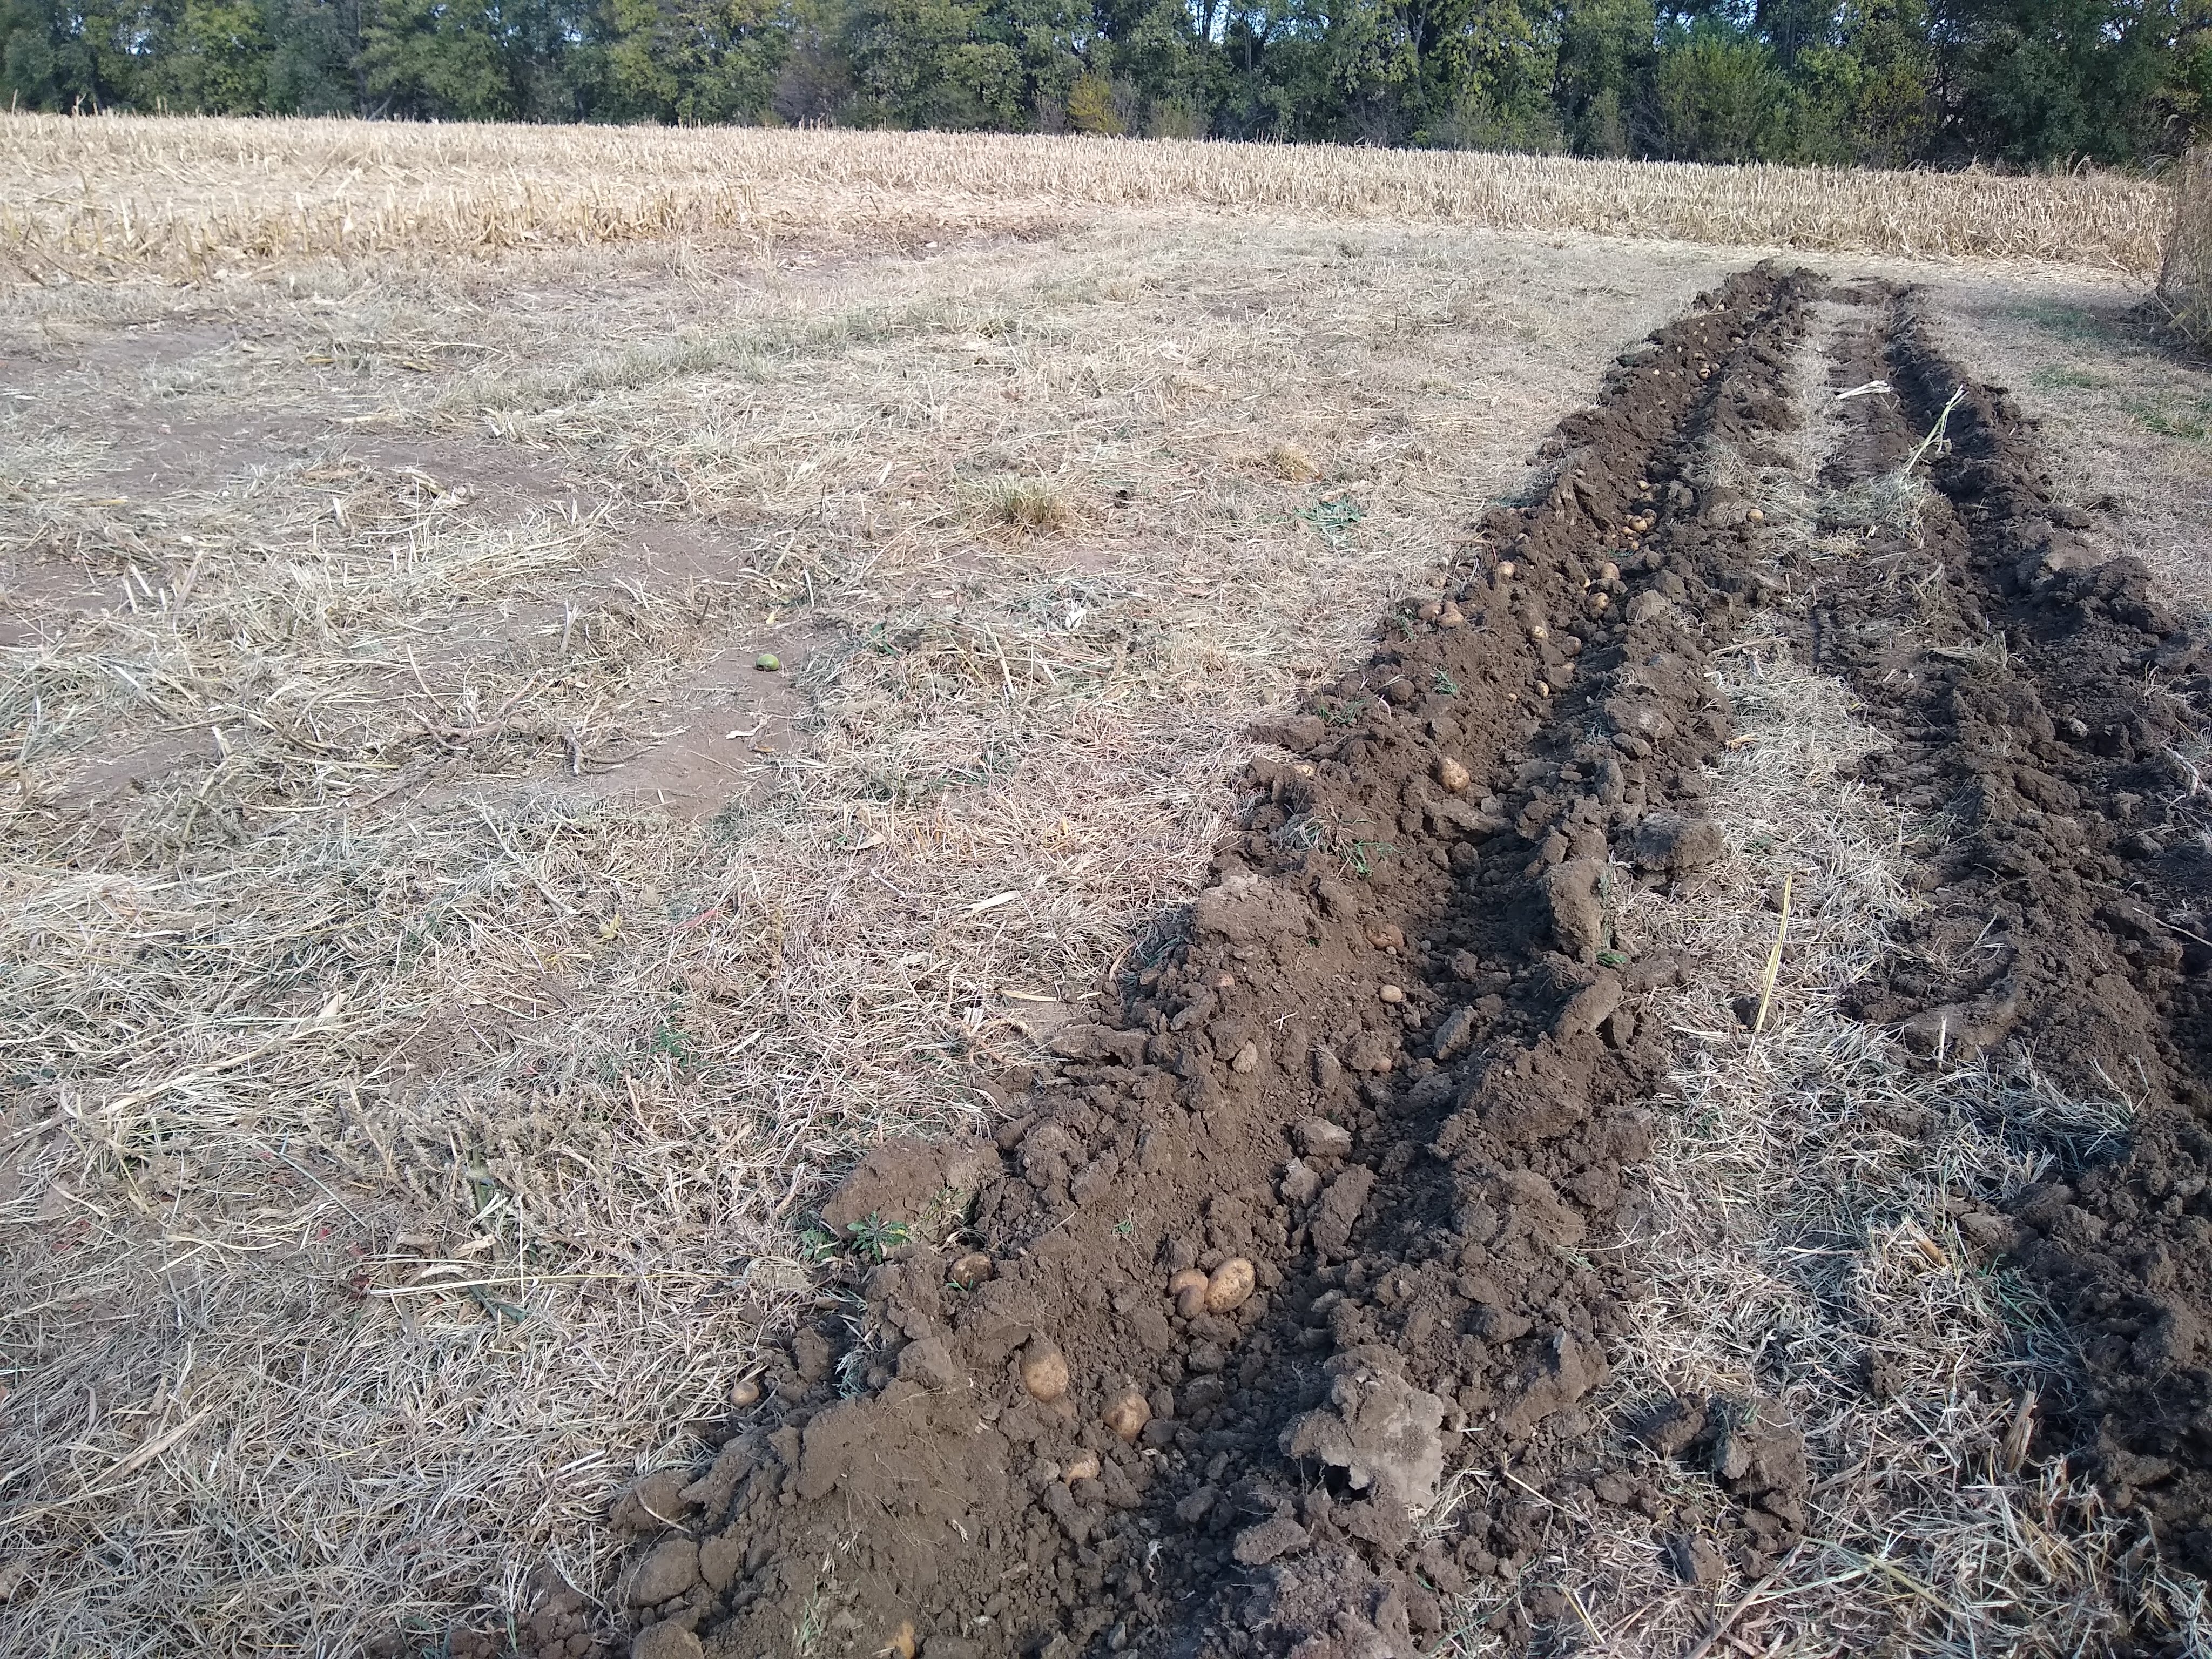
Time to clean up the Irish potato crop, too. I was disappointed in my crop this year because I didn't get nearly as many to put in the cellar as I usually do. Then I remembered we are in a serious drought and I gave away nearly one whole row this summer to family, friends and anybody who came calling. That's really the reason I keep such big gardens. That and I think it is fun.


I do have some nice spuds for winter though. There's nothing like home grown veggies.


How to clean them? Make a machine for it, of course! Here is a little video of my 'Cement Mixer - Spud Washer' in action. I had left over rubber chicken plucker fingers from when I built my Whizbang Chicken plucker. I made a belt out of an old plastic drum with the fingers in it. I can put this inside a cement mixer, add water and potatoes, and let 'er rip! Works a charm, as they say.


I really like the little ones. They're good fried and diced and ... any way you want 'em. But they're a pain to wash and clean up. "What," you might ask, "would a guy do to solve the problem, in a case like that?" Man and machines go together.


Annie decided we needed to get to the bottom of my Nearing Frame hardwood fruit tree cutting rooter. It is named after Guy Nearing, the inventor/creator. It isn't anything really except, in my case, a bottomless 5-gallon bucket sunk into the ground.


Annie just knew there were mice or something good down there.


The deeper she got, the more committed she was to the project. I want to move it anyway, so I let her do the heavy work for me. She and I were both pleased!


The Chicago Fig loved its life in the greenhouse sitting on a wicking mat this summer. It is supposed to be 'hardy' - as in it can survive - as far north as Chicago. Well, I'm in a tougher climate than Chicago, but I'm hoping that with a little winter protection it will make it. Why not try?


The wine grape project didn't make it out of the starting gate - or would that be starting box? - this summer. They did root and look lively. I think I'll pot them up this winter and maybe offer them to the Iowa State Master Gardeners for their spring fund raiser. Maybe....


Horseradish! Oh my goodness. Do I ever have a crop of horseradish!!! This one plant made two jars of the best horseradish you have ever had. And there are dozens and dozens more plants out there to be dug. One of my neighbors said we might have to be careful the toilet paper doesn't catch fire, but it is really good!


Wood cutting season is at hand, too. I have the best neighbors a man could ever ask for. Chris and Mark sent over this load for me. They had a storm disaster, and thought I could use the remains for heat. Yes, please!


Well, I promised you I'd show you how I winnow my wheat. Winnowing, for those of you who might not know the word - and who might also want to know what that means - is the process of blowing the left over straw and dirt and anything else that doesn't look like wheat out of the...wheat.

This picture explains it, except for one very important part. That part is impossible to photograph. Wind! We had 30 MPH winds one weekend recently. The temps were tolerable, and the time was right. How to do it? Easy. You just find the wind, then sift handfuls of the straw/chaff over the big brown tub. The chaff blows away, and the heavier grains fall into the tub. Bingo!


It takes several passes back and forth. It ain't a perfect science.


I use a screen to help get the filtering done near the end. 


Hard Durham Spring Wheat ready for the mill and the oven!

I think I'll get around 45 to 50 pounds of wheat from my summer's project. I think that is pretty good!

One bushel of wheat is 60 pounds. I planted a 3-pound package of seeds. Pretty good return on investment as far as I'm concerned. This isn't the final cleaned crop. My last step will be to use a pan full of water. The grain will sink, the dust and chaff will float off. After several rinses, I put the grain out on a clean towel and let it blow dry. Store in a cool dark place. Eat more bread.

Happy Halloween! All is well at Oakdale Farm.


Monday, October 17, 2022

Bean Bonanza! The Farm Report 10-17-2022

 The Farm Report
10-17-2022

Bean Bonanza!


"Hey Tim!" said Annie Oakley. "Is this a load of beans or what!?"


My Fall Green Bean project paid off in spades this year. They were plentiful, big, plump, tasty, juicy...


… And straight!


But then the other night, it was 27F, and apparently green beans don't like that.


After the sun came up, and the leaves began to warm, they showed us just exactly how much they DO NOT like cold. It was a disaster.


Well, after a panic cussing, and a cup or two or three of coffee while I licked my wounds and felt sorry for myself, I went back out to the field garden and looked again. To my surprise and pleasure, down under that frozen foliage were the most beautiful green beans still smiling up at me and just begging to be picked. So we did.


"Tim, buddy," said Annie "you're wasting our time again on these beans. Not everybody here at Oakdale Farm even likes to eat 'em." Well, Annie, I do! So I set up to pick off the beans from the frosted plants.


I've told you before that I plant Blue Lake 274 bush beans because they taste fantastic, and because they produce one heavy crop all at once. This makes it really easy to just pull the whole plant out of the patch and head for a nice chair and a shade tree to pick off the beans.

Once I have the beans picked off the plants, then I do this setup outside on my veranda and cut 'em up into canning lengths.


Some people (like my wife, Joyce used to do!) insist upon snapping them into lengths. I'm a knife guy. I take a bunch at one time and use the French knife to whack 'em into compliance. I think it is faster - and you would too if you had big old ham fists like I do. Whatever gets the job done, I say.


Time passes and this is the result. Actually, this is one-half of the result. Yep! I had/have double this amount of green beans canned and on the pantry shelf for winter. How will I ever eat all of these? Well, I don't know and I really don't care. I'll eat all I want; give some away to my kids if they want some; find friends; pitch the rest next year if I have another big crop or ???? It doesn't hurt to have plenty on the pantry shelf for me!


The Gypsy broccoli is still doing it's thing. I love Gypsy. It is delicious, and it keeps on putting off these big side shoots right up until it can't grow anymore - which will be pretty soon now. Our low temps are supposed to be in the teens for the next few days out here in the beautiful sunny southwest Iowa.


'Hey Tim! This is horseradish. It will be great on our sandwiches!" I'm not sure Annie even knows what horseradish is, but I'll let you know when she tries a bite. Some of us might have more fun with that adventure than others.... Just sayin'


I have been so thrilled with my hybrid tea rose project this year. They have just flowered and flowered growing in 10 gallon fabric grow bags. I set them in a plastic lined tire to act as a water reservoir, and they thrived. More next year!


The last rose of the season. I just love hybrid tea roses. How could you not?


More progress on the cave project! My brother came out to the farm, and we stripped away all the rotten old wood from the entrance to the cave/root cellar. The masonry part is still just about perfect. As nearly as we can figure, it was built around the same time as my house - which was begun in 1903. 


This shot is from down inside it looking back up towards the outdoors. The construction is made of fired glazed tile blocks. This was very common around the turn of the century - the last century. See the little flat sides on the steps? My Dad used to tell me that they were made that way so a slide could be used to bring heavy barrels up and down the steps. It is just too good to not repair it and make it useable again.


This is a closer look up above the steps. The ceiling is lined with wood. I think partly for insulation, but if you look carefully, you'll see some iron rings mounted in the ceiling, too. Hanging cured meat, bags of onions, etc. from these hooks was another storage trick the old guys knew. Way down in the cellar it was colder and more humid. Up in the anteroom it was warmer and drier.

The wood appears to be cypress. Cypress wood will not rot. If we're right in our thinking, this wood would be about 120 years old now - and it's still as good as when it was installed. The boards are tucked back into a recess to hold them. They are not nailed or screwed to the top.


While we were surveying the frost damage to the beans, suddenly Annie went on guard alert. She heard the Sky Tractor coming before I did. I'm a big believer in cover cropping my fields. We've done it now for a decade or so, and the soil - and the crops - show the benefit of it. The rye/radish blend (or whatever they sow) is planted from the air by a guy in a little airplane I call the Sky Tractor. He is fearless! When you watch the video below, remember, he is flying at less than tree top height and going REALLY FAST. There is no opportunity to correct for problems or stutters. Think: SPLAT! But that's how it's done out here....


Here he comes!


And now for something completely different, as the Monty Python people said. This cute little 'possum isn't going to have to worry about the winter hibernation this year. I didn't do the dirty deed, but let's just say, his subscription expired.

Every so often on places like Facebook somebody will post about how valuable the Opossum is and that we shouldn't harm them. Apparently they can make a living for themselves eating ticks. Well, baloney! This pic is evidence for you that either, A. ticks are much bigger and more difficult to kill than I thought, or B. The Opossum is a meat eater. I happen to believe more in B than A. Why? Those fangs have been used by this guy - or his close relatives - to kill and eat a lot of my chickens in days gone by. They are not the warm cuddly furry friends from Facebook. They are meat eating predators who can and will attack and kill my chickens during the night when I'm blissfully unaware. So there. Now at least I feel better for getting that off my chest. I prefer DEET to keep ticks away from me anyway.


As the seasons close on the apple harvest, I just had to make one more of my secret apple pies. What's so secret? Well, for one, I can do it. Two, I cheat. Remember, I'm an old guy on my own who has lost his champion baker. I have not lost my appetite! What to do? I buy the crust at Walmart. I pre-bake it in a pan. Then I put some microwaved apple slices (I have a machine for that, of course) into the bottom of the pan. I then pour on some applesauce - mine is home canned from my own apples. I add more apple slices and so on until the pan is about ready to overflow. I put a few more slices on to make 'er pretty, and bake it some more. This time, I put on some sugar and cinnamon powder. Serve with aged cheese.

More next time. All is well at Oakdale Farm.