The Green Door
The Farm Report11-15-2022
 |
What's behind the Green Door? A heck of a lot of detail work! This is the finished outside door on my Grandpa's root cellar/storm cave. I've spent quite a lot of time getting this project finished, and I've had a number of questions about it too. So, I thought I'd just do a whole blog post on it and let you follow along as I built it. |
 |
Here is where the project started. This old 'Cave' as we always called it, was just a few steps away from the old house where I grew up. That house had no basement, so there wasn't any place to store food like canned goods, potatoes or apples, etc. There also was no place to go duck when a tornado threatened. Out here, they do, and pretty often! Ask Dorothy. After lots of family discussions, we have all pretty much agreed that this must have been dug at about the same time that my house was built. Make that 1903. Why? The old house that isn't there anymore was moved from where my house is now to the 'new' site. We think the well, which is just out of camera view, and the cave were made at the same time. The quality of the masonry construction is superb. It was made by tradesmen, who would have been on hand to do the house project. Over the years, the original outside door fell apart. The original wood framing members were still hanging around, but the door had been replaced by a piece of plywood. |
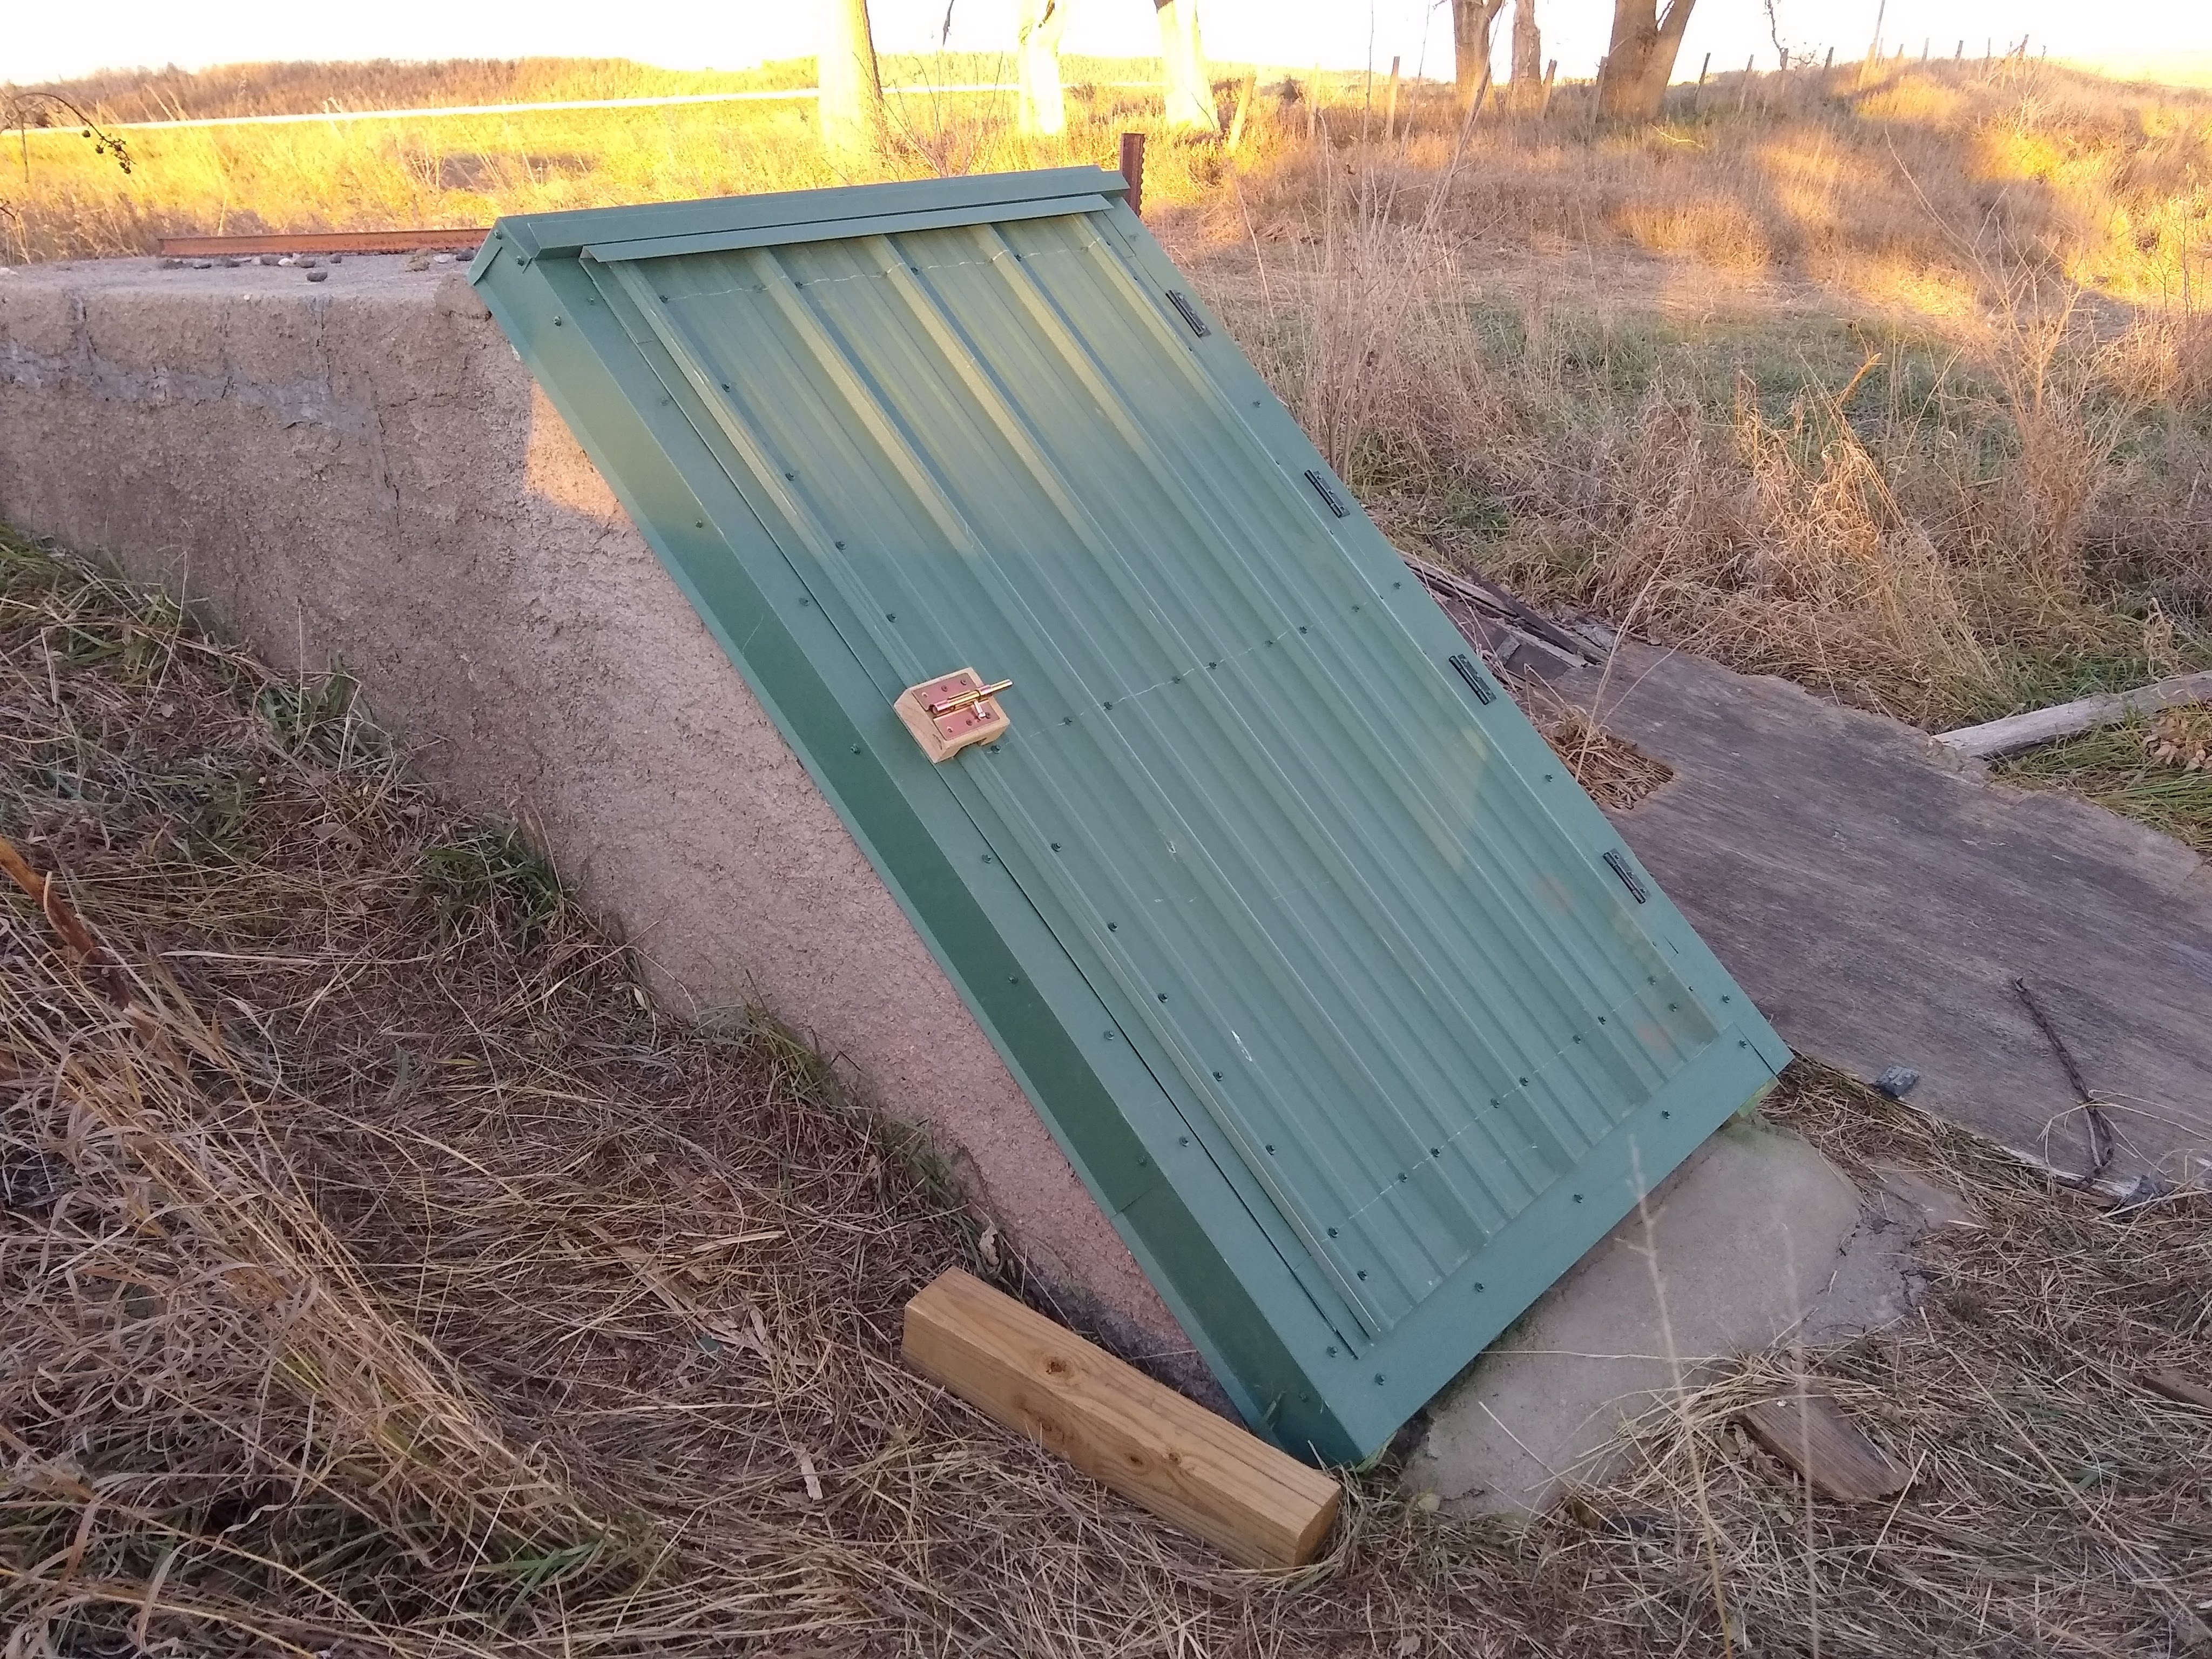 |
From that to this. I'm risking breaking my arm patting myself on the back, but I think the new door came out pretty good. We'll need to pour a new concrete stoop next spring. |
 |
First things first, though. These caves needed a vent to keep the air fresh and to provide a little air circulation. The original clay tile vent pipe had been removed a long time ago. I didn't want to risk being down in that cellar without venting. It could become a CO2 death trap. That happens, and it is dangerous. So, first we attended to the vent. Oh, and just for reference, the cave extends about 2 more feet behind that vent tube toward the left of the pic! The cave is about 8ft by 12ft with a domed ceiling and deep. When I'm standing in the bottom of the cave room, my head is below ground level. It is about 12 feet down from this vent tube. The concrete work around the door is just the ante room and the steps. |
 |
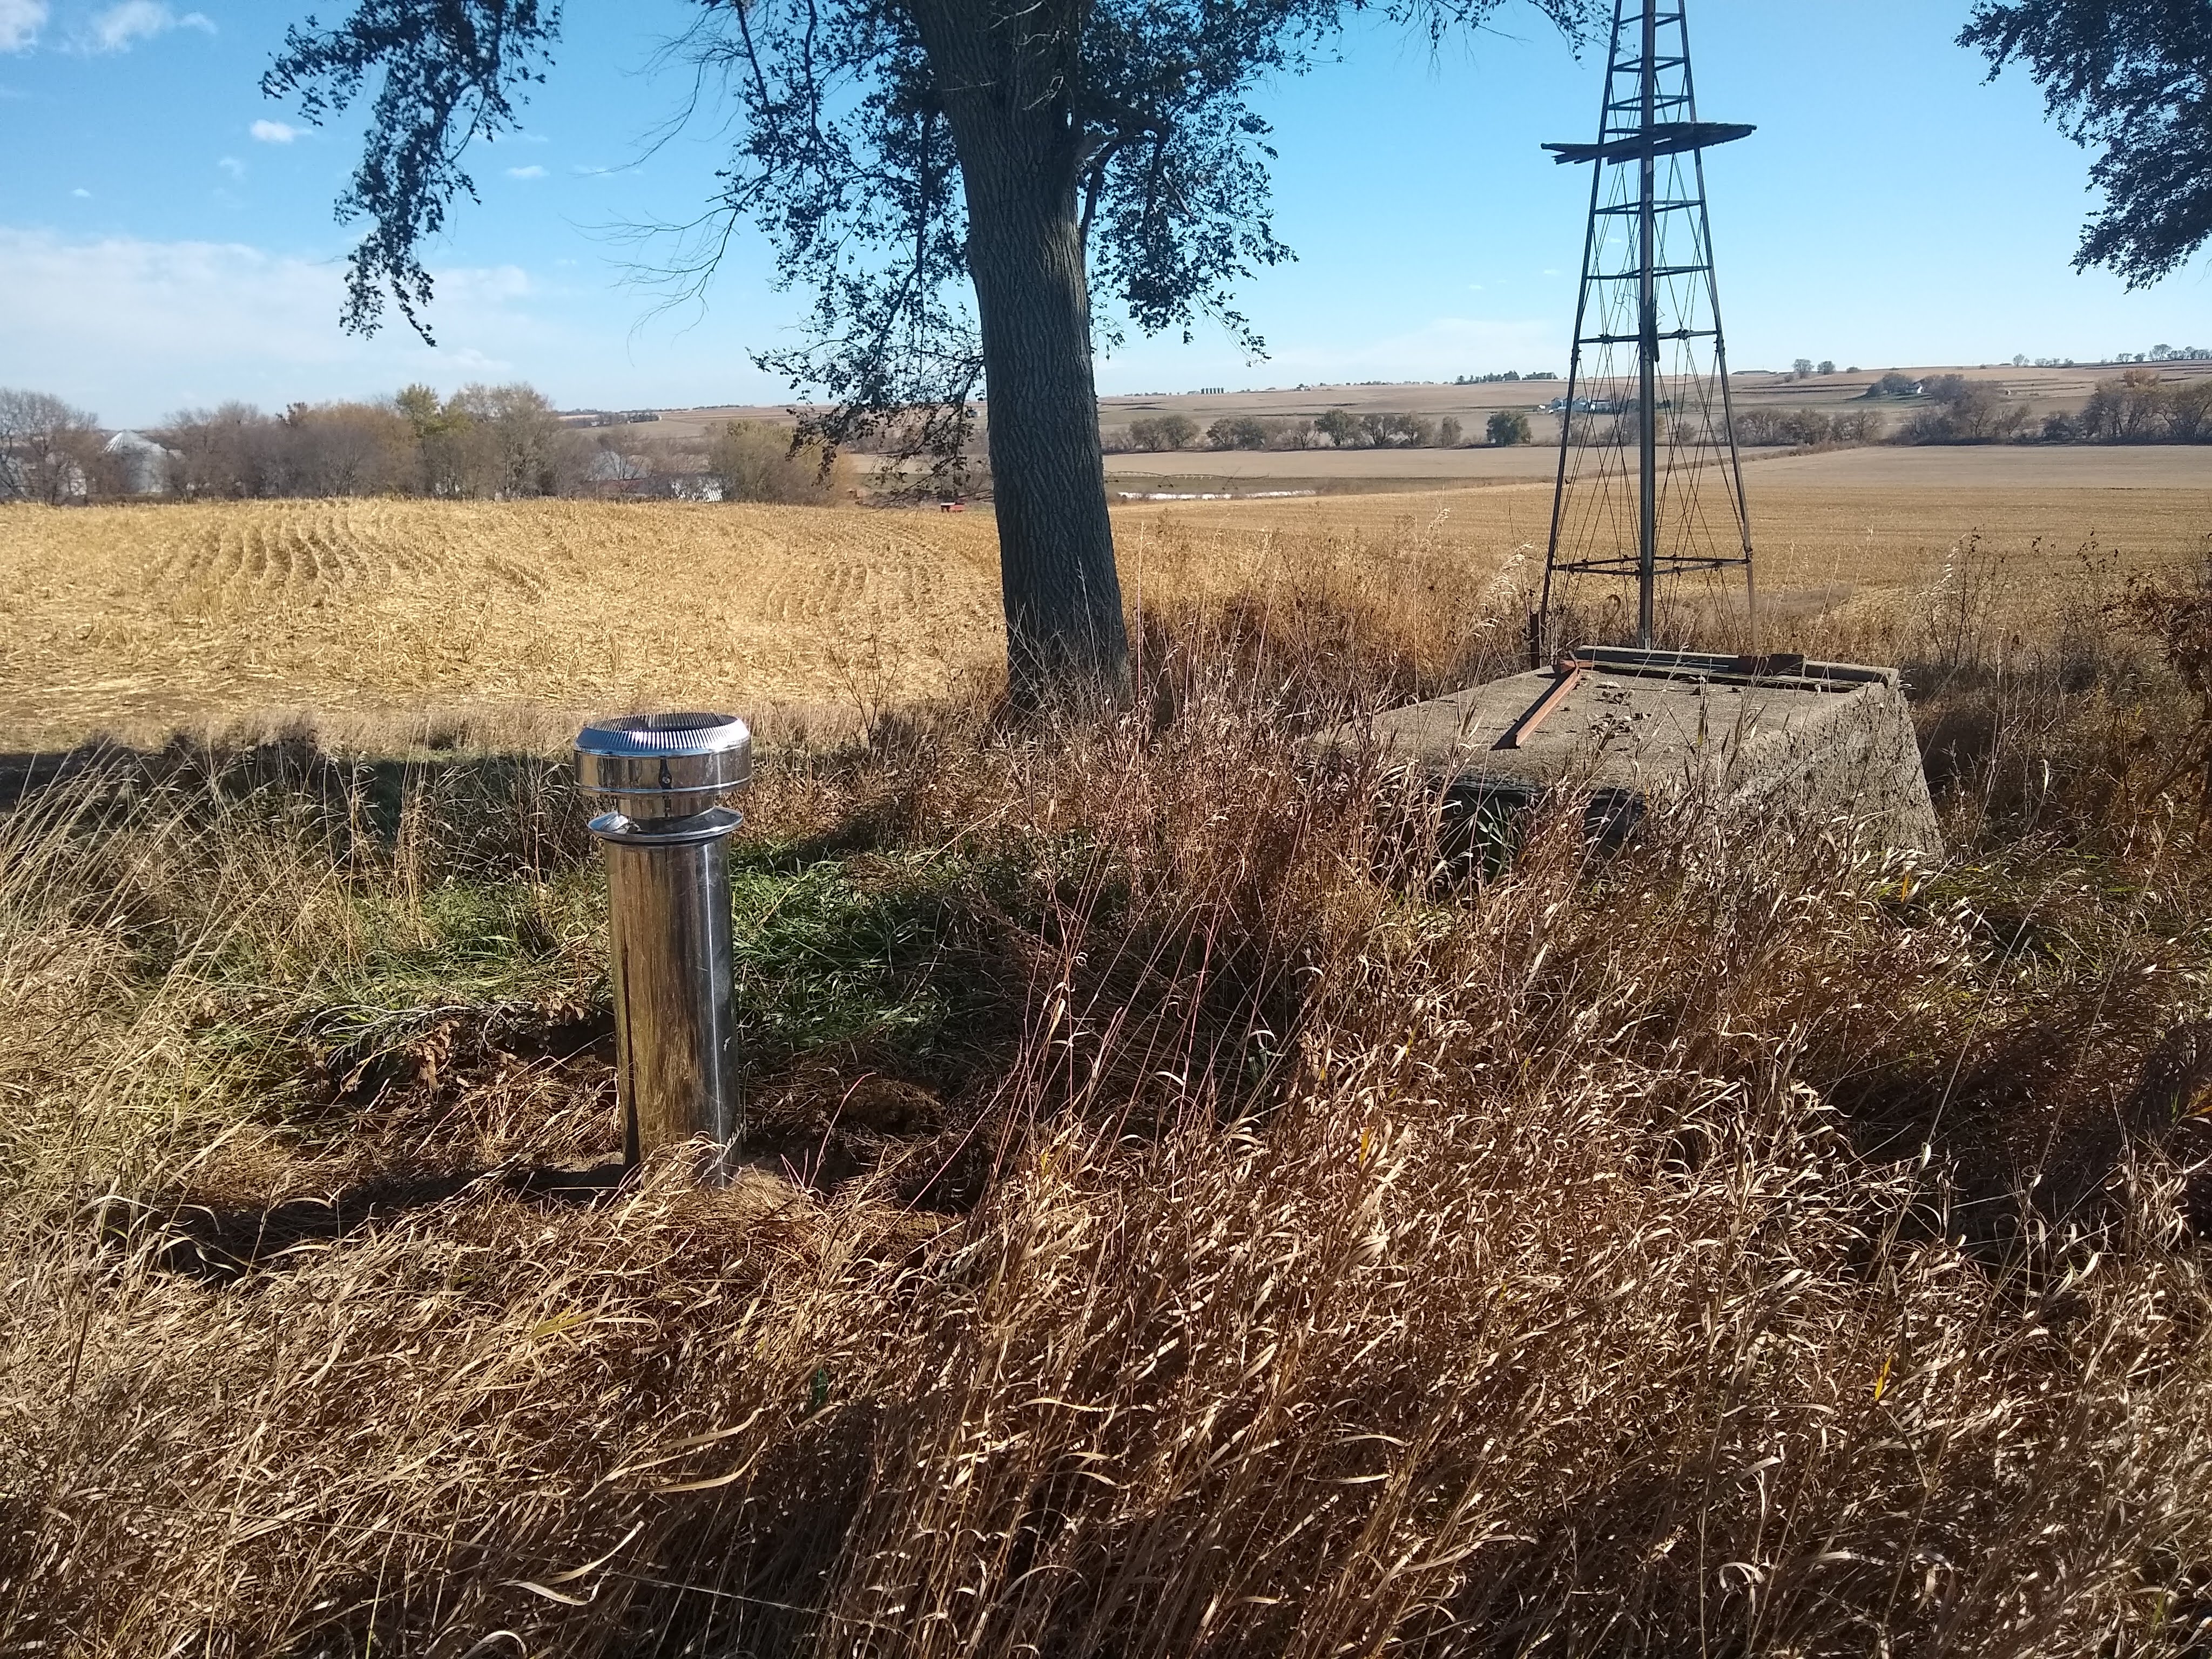
Not everybody would use a Class A stainless steel chimney for their cave vent. I happened to have the pipe from salvaging another project. So...why not!? My brother came out to the farm and we conjured and witched to find the spot where the old clay tile vent tube should have emerged from the ground. We poked around and did a little test digging and 'Presto!' we found the original remains. |
 |
After some judicious digging and fitting, we put in the stainless tube. It is about twice as long as what you can see. We poured ordinary dry builder's sand around it to seat it in place. |
 |
Then we put soil and sod back over it to finish it off. Annie was bored with the project, but she couldn't stay away. She new there weren't any mice down there, but when somebody is digging, she's in! I also had the stainless steel bird/rain cap, so we finished off the vent in Fifth Avenue style. |
 |
After the original wood plates were stripped off the concrete, we discovered the original anchor bolts were still in good shape. A little strategically placed heat and a bit of brute force and the old square nuts turned off like magic. |
 |
I used a Vice Grip pliers to hold the bolt shaft while I turned the old nut off. |
 |
And here's proof they don't make 'em like they used to. There was a little concrete 'squeeze out' left from when the original plates were set in the wet concrete. I thought I'd just take a cold chisel and hammer and clean off that excess so I'd have a nice flat surface to mount my new plates to. Well! That concrete is hard as granite!!! I tapped and tapped, then pounded and pounded, then slugged and slugged until my arm was sore. I finally just called it close enough. No wonder the old cave is still in like-new condition. |
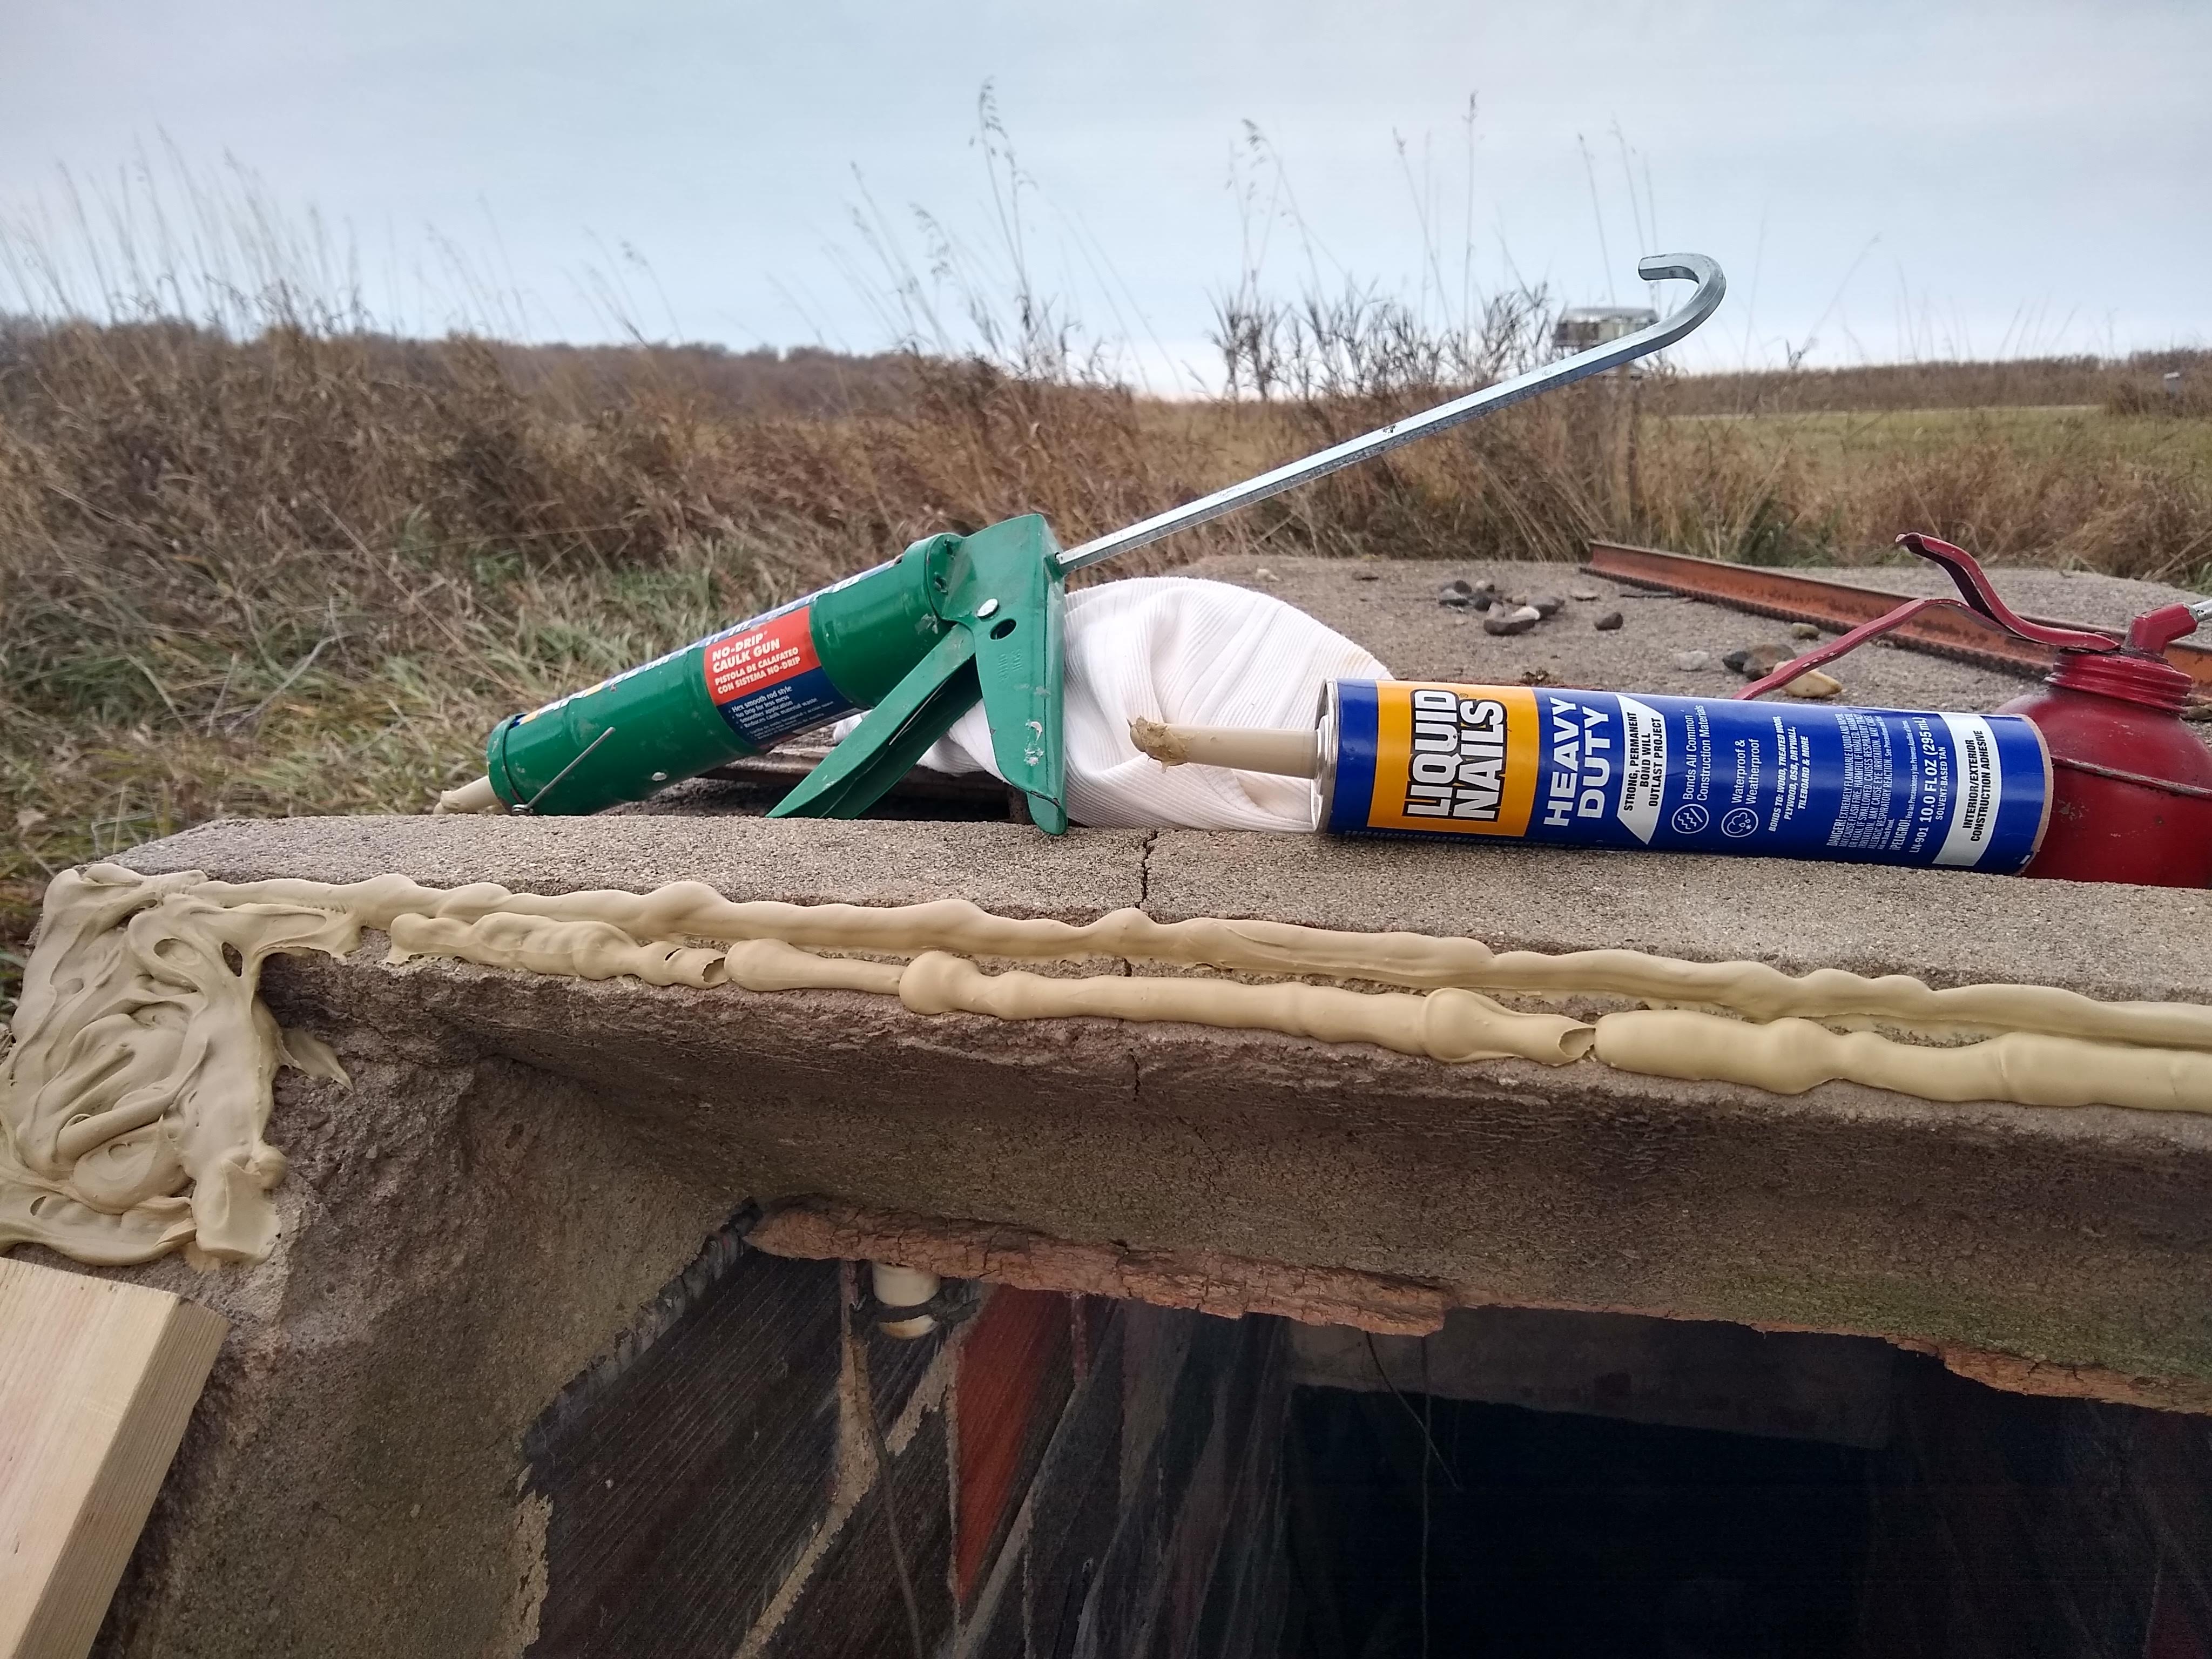 |
It isn't 1903 anymore. We have great new adhesives now that the old guys didn't even know about. I decided to set my new plates in a generous layer of 'Liquid Nails' construction adhesive instead of mortar. It is waterproof, bonds the wood and concrete together, and seals everything in place. |
 |
Here is the first set of plates down and tight. |
 |
So here's a little carpenter's secret. I didn't want the anchor bolts to be exposed, and I wanted to make a 'ledge' for the door to seat into for a better seal. I countersunk a blind hole on the underside of the new top plate so the anchor bold and nut would have a place to hide. You can see the anchor bolt which is screwed down tight, and the underside of the new top plate with the blind hole drilled into it. |
 |
Same shot, with the new top plate flipped over and in place hiding the anchor bolts - and protecting them from weather. Always test fit your work before you apply glue! |
 |
I did not pose this picture. I absolutely promise that I did not pose this picture! Annie Oakley has been my job boss on this whole project. When I set the new base plate it was obvious I had made a little mistake. She saw this from her seat in her Ranger and hopped out to come do a close inspection. She SAW my error! I repeat: I did not make this up. |
 |
"Tim. You can do better than this. You're a professional wood worker." She looked up at me with this expression on her face, and I felt like a school boy caught cheating in class. I did not make this up. I was at least as disappointed in the error as Annie was, but I know how to fix my goofs, and we'll take care of this later. Nobody - except me and Annie - will ever know. |
 |
I did pose Annie for this pic. After I got the top plates glued and screwed down tight, we both breathed a sigh of relief and went home to make the door frame. We are both pleased with the new frame and plates. |
 |
I'm using up the metal left overs from my roof project for the skin on the cave door. I made a wood frame in my shop because it is so much easier to do there. I also used too many hinges, but remember - I live where the wind does blow! And the door will undoubtedly catch the wind sometime and try to go sailing. Overbuild, underuse.... |
 |
I used too-big hinges so I had plenty of iron to fasten to. A little black smithing, and I bent the hinge legs over so I could have a screw holding from a different vector angle. I grew up here, and I know what wind can do. |
 |
Fitting doors is hard to do. It is even harder to do when you're working by yourself and you can't see what's going on underneath the steel skin. Solution? fit the door without the skin first! Another pet peeve of mine is doors and drawers that drag. Doors and drawers that fit too tight have been one of my signature gripes all my working career. Antique furniture sags and drags. Then folks start using their shoulders and hips to close the doors. Eventually, the cabinet breaks and I get a job. So...I left a big gap all around and allowed for the door to sag as it gets older without being able to drag. It has a nice smooth movement, and I have engineered it to seal on the bottom edges, not on the sides. |
 |
Skin on, and Annie was ready for the end of the day. |
 |
The next day we went back and finished facing out all the exposed wood with metal flashings. Now, there is absolutely no wood exposed to light or water. There are no joints which can be rained in or on, and this project should last another 120 years. So, in 2142, she might need a new 'un. I wish I could be around to see. I remember as a boy that the concrete work was mostly covered with soil. Over the years that soil has washed away. We're already making plans to bring in new soil and a machine to cover and berm up all the concrete like it used to be. |
 |
What will we use the cave for now? Who knows. It was just too good to let it go. Here are some amaryllis and canna lilies I dug which I will put down in there for cold winter storage. I have my potatoes stored away in another place for this year. Next year, though! I'll store my potatoes, carrots, beets and whatever down in the old cave. |
 |
This is a canna lily root. The horizontal one is the part I paid $15.00 for last spring. Every one of the vertical ones will make a new start next spring. This isn't a money making project, but when you can store your bulbs overwinter in a cold root cellar, you can multiply your work pretty cheaply! |
 |
The season has closed in for sure now. These are my Gypsy broccoli plants. |
 |
And this is why I love Gypsy broccoli. It was still growing new broccoli heads right up until the plants just froze off. This last treat is special. You've never tasted anything so delicious as the last cold-grown broccoli of the season. Eliot Coleman says that 'sugar is Mother Nature's antifreeze.' He's right. The last Gypsy broccoli is tender, juicy, mild and sweet. Next year! |
 |
They're still at it. OJ likes to pick up where I leave off in the mornings. Apparently the blankets are still nice and warm for him. Annie wants attention - even from OJ. She thinks that if she rolls over on her back and slides in he'll be nice to her. Watch OJ's ears in these pics. They tell the whole story. Also, watch Annie's eyes. She's getting to be an older but wiser girl now! |
 |
"This isn't going good, Tim!" |
 |
"He's sticking his paw out at me!" |
 |
When OJ started to spread his kitty toes out to make his Tomcat claws ready to attack and raised his head so he could look Annie right in the eye, Annie decided it was an O.S. moment and got the heck outta there! She's a wise girl. So that's the Green Door project. All is well at Oakdale Farm. Eat more turkey! |
I'm sure there's no way your new, refurbished, old cellar won't last for another 120 years! When you do a project you do it right. Thanks for documenting it for us. A picture IS worth a thousand words. (Although we bloggers can't help but using those thousand words at times!) Don't you think you should get Annie a pup of her own? One that would bond with her and enjoy a nice cuddle-up now and then? Would be a lot easier than trying to be friends with a persnickety cat!
ReplyDeleteI'm glad you enjoyed following along. I like to 'get it right' the first time so I don't annoy myself with what I 'shoulda done' all the rest of the time afterwards. Having roofing metal scraps left over was just the icing on the cake for this project. Two Annie's at one time? Yikes! Annie is tons of fun, but she's a real handful too. Heelers are not 'warm and cuddly' dogs - but they are very affectionate and caring, albeit in their own pushy/bossy way. I think I'd better stay with just one at a time....
DeleteDrat. Don't know why blogger has been listing me as "Anonymous" lately. Above was me, Mama Pea. :o\
ReplyDeleteSure hope that cave is appreciated by another two-three generations as it should be! Michelle at Boulderneigh
ReplyDeleteThey say we plant trees for the next generation. Maybe keeping the cave intact will work out that way, too. Meanwhile I'm going to be doing my darnedest to make use of it for a long time myself! Cheers
DeleteCurious about your amaryllis bulbs. Do you peel them for storage? I grew Gypsy broccoli this year, and have been harvesting shoots every 2 to 3 days until they went limp with an heavy frost a few days ago. The stems were so thick, I used an axe to chop them as I didn't want to pull/dig them and disturb the soil under the mulch, now that it is frozen. This morning, we awoke to a white world...first snow of the season. Love that root cellar, super job! We are hopefully building one next summer.
ReplyDeleteI do not peel the amaryllis bulbs. I do wash them off with running water from a garden hose. The spent 'peels' wash away like dried onion skins. The remaining layers will 'reskin' for me. So, what you're seeing is just the new clean 'skin' layer. I've done this for years and years. Sometimes, I give them a dunk in some Lysol solution if I'm worried about disease issues. Otherwise, they're pretty bullet proof for me. Into the cold for a few weeks, then I'll repot and enjoy blooms in the house. Then, eventually they go back outside into the garden for the summer. They really don't seem to need much TLC. And yes! Gypsy just about needs an axe to remove them in the fall. It is a fantastic broccoli variety. Good luck on your root cellar project. They are so much worth the effort - and it is a lot of effort and expense! - but something that puts a big positive edge on your gardening and preserving slate.
DeleteYou do stellar work. The root cellar restoration is amazing. Your high winds are not going to move any part of this build. Annie is relentless in her desire to be OJ's friend. That said, she's reading OJ's signals pretty well and averted a clawed slap. Good girl!
ReplyDeleteHappy Thanksgiving! (I almost forgot...)
ReplyDeleteThanks for the Thanksgiving wishes! Same back to you and all. Annie is getting wiser - but she just can't leave O.J. alone. Annie reacts, O.J. plots. And thus it will ever be....
DeleteThat's a great job you've done there, I think they'd be proud you kept it goign rather than letting it fall down. I'd love a root cellar, maybe one day!
ReplyDelete