Tool Time
The Farm Report
07-25-2023
 |
Tool Time! This time, it is with Tim - me, not Tim Taylor of TV fame. I get questions about my favorite garden tools and which ones I have. So, I thought maybe it would be good to take a little time out and show you some of my favorites. Some you buy, some you make. Everybody has, or has seen, one of these old fashioned hoes. They are a dime a dozen at garage sales and farm auctions. They are NOT a dime a dozen at the new hardware stores! This one, as shown is NOT my favorite. I don't know how they ever came to be so widely accepted. |
 |
This is called a 'Dutch' hoe or push hoe here in the USA. It is much more practical and common sense. The old fashioned one relies on your arm muscles and vocabulary of cuss words to make it work. It gives credence to the old expression, "You looked like you were killing snakes out there," when somebody sees you out in the garden trying to whack out weeds. The Dutch/push hoe uses the mass of your body and the inertia of pushing towards the weed. Once you get going (especially if you're a big old guy like me) the weed can't stop the forward progress and the hoe - kept SHARP! - simply slices the weed off at ground level. When it 'fits' you right, the blade just slides along the top of the soil much like a shuffle board pusher works. I think I may have mentioned on here once or twice that I am a native born Iowan, and that gives me license to be 'thrifty.' I've wanted one of these Dutch hoes for a long time. But gee whiz! Pete. These things cost almost a hundred bucks. Too rich for my blood. |
 |
What to do? Ask Good Neighbor Ron if he might happen to have a used auction hoe laying around handy, fire up the torch, and make one of your own. Yep! That is a picture of the old standard hoe with the crook in its neck bent out straighter. It don't look so fancy, but by golly, it works! |
 |
This is the angle I bent that fits me. I keep it super sharp with a handy bench file, and away we go. I can scoot it along on the top of the soil, I can use it to jab down hard on a stalk, and I can use it to bend a single weed over in the melon patch before I give it the Anne Boleyn decapitation whack! And, best of all, it didn't cost me a hundred bucks. That tub is my first onion harvest. These are the Texas Grano 101's; at least some of 'em. |
 |
This is a lazy way out, but I'm trying to show you the Ruth Stout potato fork I use to 'pull' the onions. With this tool, I don't have to bend over. I use it to pick up potatoes, too. Ruth was the sister of Rex Stout - author of the Nero Wolf mystery books. Ruth was a character and a true master gardener. She pioneered the 'No Work' garden system of heavy mulch. She was a writer in her own rite, and published a number of garden books. If you don't know about her, or if you do and it has been a while since you've read her stuff, then it is time to do it. Refreshing and valid to this day. I love her attitude. She's been gone a long time, but her books are still available. You can actually see her in a Youtube interview. She always went on patrol in her garden carrying one of these little forks. I do, too. Click here to watch Ruth Stout |
 |
A bucket of onions! These are not keepers, but they are sweet and good. |
 |
After decades of trying to grow and keep onions, my sweet mother told me one day - as I was expressing frustration - "Oh, why don't you just freeze them? They freeze really well." Thanks, Mom. Well, better late than never I guess. So, I tried freezing onions and Mom was once again right. They DO freeze well and keep a long time, too. Perfect for winter cooking. I sit on the shop park bench and peel the onions before I take them into the kitchen for chopping. I put two cups of chopped onions in a bag. |
 |
More food toy tools! After a good wash, I slice the onion into good half-inch thick slices. That's usually three or four whacks per onion. Then the fun happens!! I put my French fry cutter on the counter (it has a suction cup foot to keep it locked in place). I get it up as close to the sink as I can. Then I put a big plastic bowl down into the sink to catch the chopped onions as they EXPLODE through the cutter. You can't stop laughing, even though I've done it this way for years. Permanent 5th Grader.... |
 |
I say they EXPLODE into the pan because you can't just push the handle down gently. It won't work. You need to BASH that handle down with a high speed flick of the wrist. Bam! Sometimes, the onions actually shoot all the way across and get into the other side of the sink. But it works. |
 |
Twenty-seven bags later and we're ready for winter. I like to vacuum bag my onions before I put them into the freezer. Two cups (about two medium onions) per bag. The vac bags won't let the onion smell get out into the freezer. I've mentioned this before, but the real secret of vacuum bag storage isn't actually the vacuum - it is the BAG. Plain old ZipLock bags are made of polyethylene plastic. It is water proof, but water vapor will go through it. ZipLock freezer bags are thicker to make it harder for the water vapor to exchange, but it still does. Vacuum bags are made of laminated plastic with a nylon layer in the middle. Nothing goes through nylon. And they last and last. I found some onions 2-years old laying in the bottom of the freezer and guess what? They were just as good as when they went in. |
 |
Not all of the Texas Grano 101's went into the freezer. Homemade French fried onion rings are to die for! Couple that with some real brats and a dash of Martin and Carola's recommended German Currywurst Sauce and you're ready for Heaven. Or a long nap anyway. Delicious! |
 |
Back to the 'truth in lending' department of Oakdale Gardens. This is the carrot row. On either side of the carrots were the onion rows. These rows were/are three feet apart! The Texas Grano's were about one third of each side. They are gone now to freezer camp. The rest of the onions on down the line are sweet yellow Spanish onions. Interestingly, the Grano's had given up; their tops flopped over to tell me they had spent their time in the garden. But the sweet Spanish onions are still growing. I'll let them go a while longer to see how big they'll get. They do keep pretty well, so maybe I'll try to save some of them for fresh onions into the fall and winter. Or until they rot in the bags ... again. |
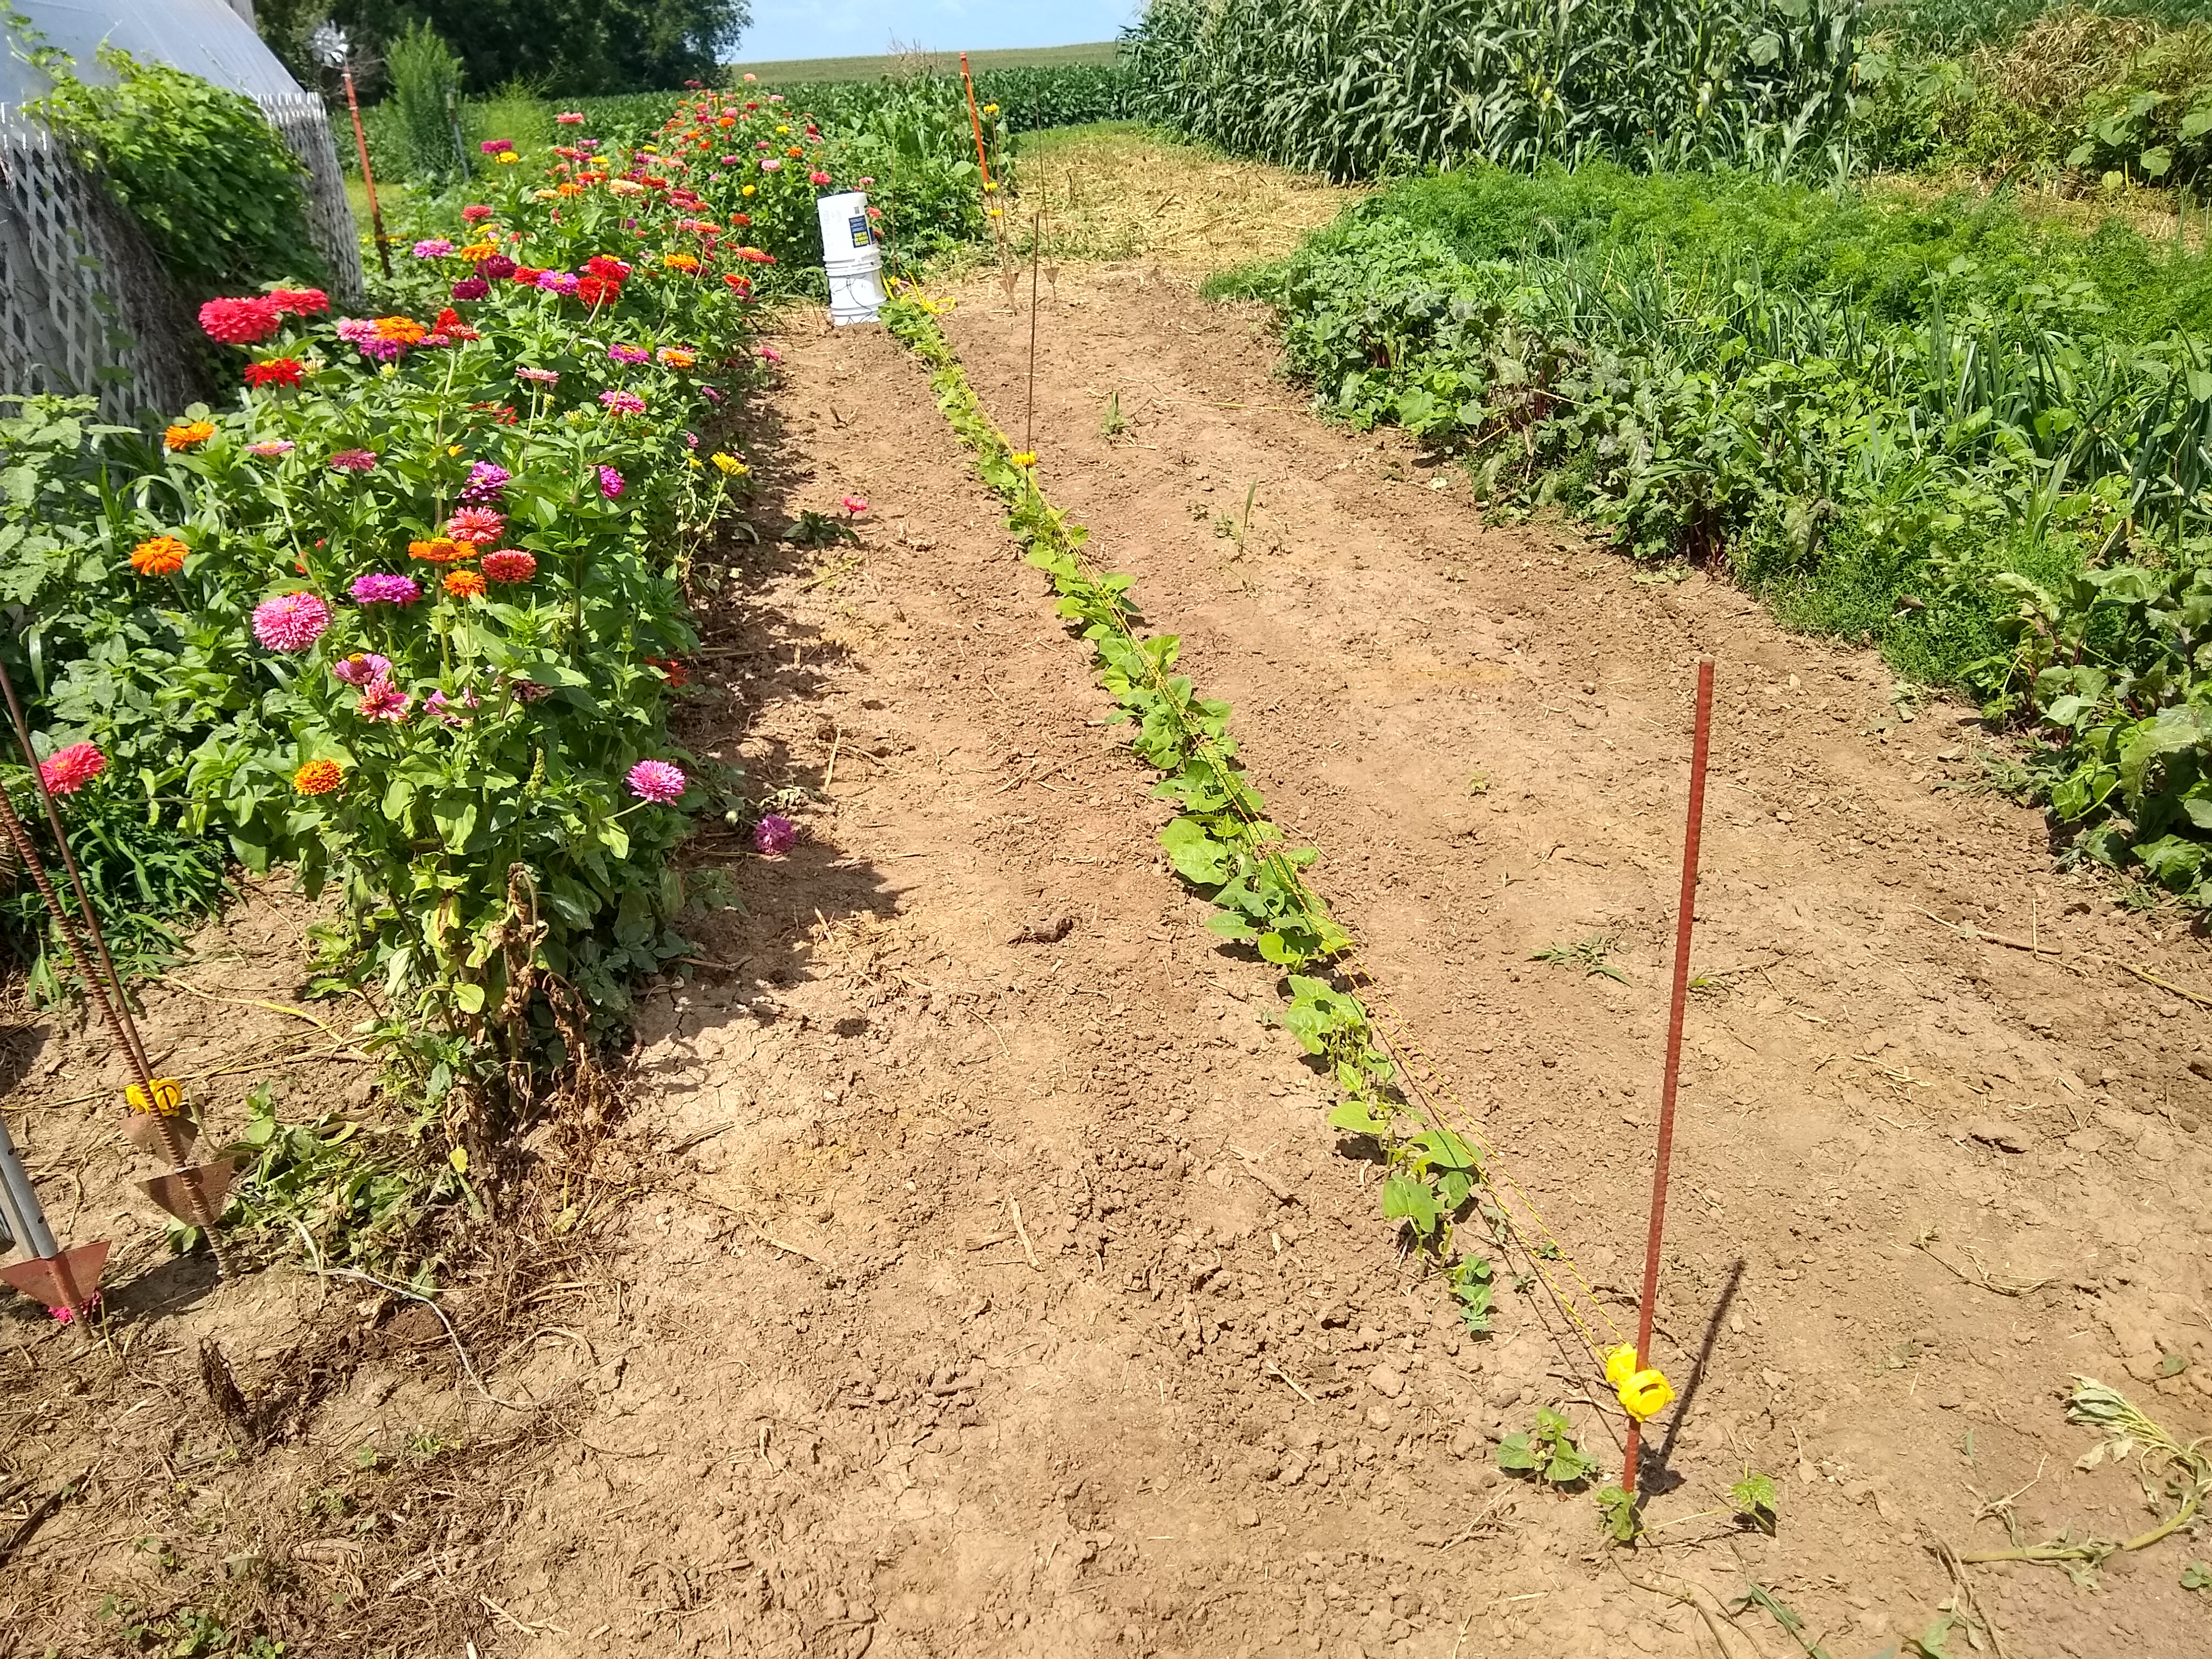 |
My spring green beans just did not like the hot dry spotty weather we had. They were woody and irregular. I mowed 'em off. Then, I planted these. I mixed three different kinds of POLE green beans in the planter and put in a nice long row for my 'fall' garden. |
 |
That is MY fall garden. As you can see, Mr. Bunny Rabbit thought they were for HIS use. NO. That little yellow wire is my way of telling him that, too. |
 |
Another important garden tool is electricity. You don't need much of it, but you do need it to be VERY HIGH VOLTAGE. Inside the buckets is hidden the electric fence charger. ZAP! Mr. Bunny. Take a hint and go someplace else. |
 |
All you need is an insulated wire and some clips to get the Zappifier connected to the fence. I use cheap Walmart battery jumper cables. The red one is the HOT wire; it is connected from the charger in the bucket to the insulated fence wire over the bean row. The black jumper is the GROUND wire; it is connected from the charger to the steel fence post that is driven into the ground. When Mr. Bunny (or Annie) touch their wet little noses to the wire, the path to pain follows from their nose down through their toes and back to the connection on the post. ZAP! Message delivered. For a permanent 5th grader, this is a hoot to watch. It looks like something you might expect to see in a Road Runner cartoon. Feet spinning a hundred miles an hour. A mammal that shouldn't be able to that is flying, and the fur is standing on end with electricity coming off it. Yes, I have touched it. Yes, it hurts. No, it doesn't do any long term damage. But Yes, it will get the message across! |
 |
I don't know if this is a 'tool' or not, but it is handy. These are actually two cattle panels held up for the beans to grow on. A steel post at each end and some plastic zip ties and you're good to go. No bending over to pick, and I think pole beans are more flavorful, too. Stay tuned. |
 |
I'll be planting California Zinnas again next year. If you look way down there at the end, you'll see the remains of the blown over sweet early corn rows. We all had some to eat. The raccoons and Annie Oakley got more than their fair share. |
 |
No picture, but another top 10 in the must-have garden tool list is a big strong mower. I mowed out the spent sweet corn, and I'm getting ready to move the fencer over here any day now. The bunnies have been 'messaged' as we say in the modern world, and it is now time to 'communicate' with the possums and raccoons. |
 |
I make these little wind jammers from 2-liter soda bottles and a piece of bent wire. They make noise when the spin in the wind. I think it helps keep the 'coons and deer out of the garden at night. |
 |
I got the idea and copied the plan from Mr. Sam the Allotment Man on Youtube. You can learn a lot from Youtube. |
 |
This mess is the musk melon patch. I left 6 feet of space for them, but they've taken 12 or 15 feet! There are a lot of melons hiding down in there. I can't wait. |
 |
Here is my cucumber fence. Another cattle panel job. That's my cheap 'Iowa' Dutch hoe leaning there with another neat little tool. It's a 'tying stapler' I paid actual cash money for. With one whack of the handle, it will wrap a neat little strip of bio degradable plastic around the fence and the plant vine, then staple it and cut it. In one whack! I used to use twine and tie it, but when there's a tool, I say go for it! |
 |
They're all over the internet. I think I got this one from eBay. |
 |
So I do have a lot of cukes coming on. This is the hydroponic dill project. Actually this is the hydroponic dill project that went FFFUTTTT! A big disappointment, but now we know. I've got friends who have lots of dill for me. |
 |
Tools you can make from nothing. This is just a plain old coffee can with a wire bail put on it. The bail lasts, the cans don't. I carry new potatoes, a few cukes and whatever into the house with it. I know... but still - it is fun to do something with nothing. |
 |
You just bend the wire, poke it through a hole in the plastic and then give it a kink with your pliers. Easy peasy. |
 |
There you go. The roses are not quite what I'd hoped for, but they are blooming. We're at the end of garden planting time, and the days will soon be getting shorter. We've had a coolish summer so far and that's just fine with me! All is well at Oakdale Farm. |
Wow; you're talking like summer is nearing the end and we have at least two months to go, maybe longer! -- Michelle @ Boulderneigh
ReplyDeleteWell I'm just a realist, I guess. You know what they say about pessimists: A pessimist is just an optimist - with experience. It's all good!
DeleteI look forward to your monthly posts, I learn a lot so want to say thank you for taking the time.
ReplyDeleteGlad you're enjoying following along. I do enjoy the whole circle of it - both the 'doing' and the 'telling about it.' Cheers
DeleteGood golly, Tim, what a plethora of useful info! Loved this post. Ruth Stout was one of the first gardeners I studied when I first started gardening (some 104 years ago). I think of her every season because her sister (if I remember correctly) lived with her and her husband and prepared all their meals using the wonderful, fresh produce from Ruth's garden.. (Not having the time to spend in the kitchen creating fantastic meals straight from the garden is a real frustration for me.) I MUST get one of those "staplers" for tying up climbing vines. I spend way too much time using string and it's a task I dislike . . . a lot! I'd never heard of one of the tools you describe before. Thank you!
ReplyDeleteI've been a follower of Ruth Stout for as long as I can remember. Joyce and I used her hay (not straw!) mulch system when we were in Wisconsin nearly 25 years ago. The other day, as I walked past a book shelf, he 'No Work' gardening book jumped out at me and shouted my name. Re-reading it has been a hoot. Now, I've got ideas for next year. She had a major attitude that I love. Cheers.
DeleteThat's looking great! I like a push hoe, but need to make a narrower one..or find an antique as they used to be made! Have you ever tried a swoe?
ReplyDeleteI have not used a swoe. To me, it looks like a marketing excuse to sell a push hoe. Just my view. I have a small 'sickle section' hoe I made into a push hoe. It is about 2.5 inches wide. I find it is too narrow: the weeds slip off to one side. Overall, I think the most important thing is to get a tool that works for YOU. We're all (fortunately!) different. Thanks for following along. Cheers.
DeleteThanks for another GREAT newsletter, Tim!!! Dave & Sharlot
ReplyDelete